|
7/5/2016 0 Comments Easter Brunch EssentialsThis past Easter I threw a small brunch with our closest family and friends. I live for hosting and throwing events, so, of course, I went all out! This is one of three posts, in the first, I'll walk you through my design choices and where I found a few items. The second post will show off the final set up and the third I'll cover the menu. 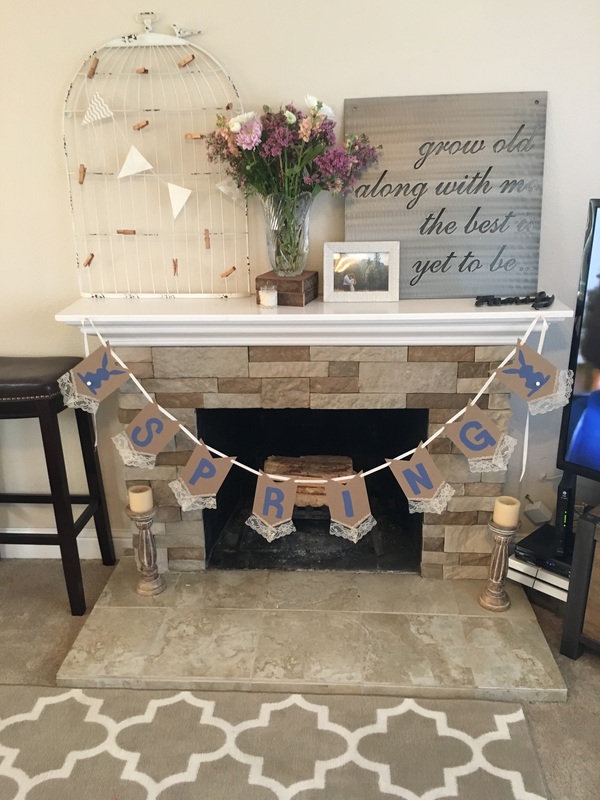 I hand made the spring sign by using a few simple items. List
First, decide what you want to write. I practiced on a sheet of paper first and then in pencil spelled out my desired word. Next, trace over the pencil in blue paint or stick on your letters. Set aside the banner until the paint has dried. When ready measure and cut the lace to fit the bottom notches of the flag. Use your glue gun to fasten the lace. Next, measure out your ribbon and string through the banner loops at the top. Display where desired. 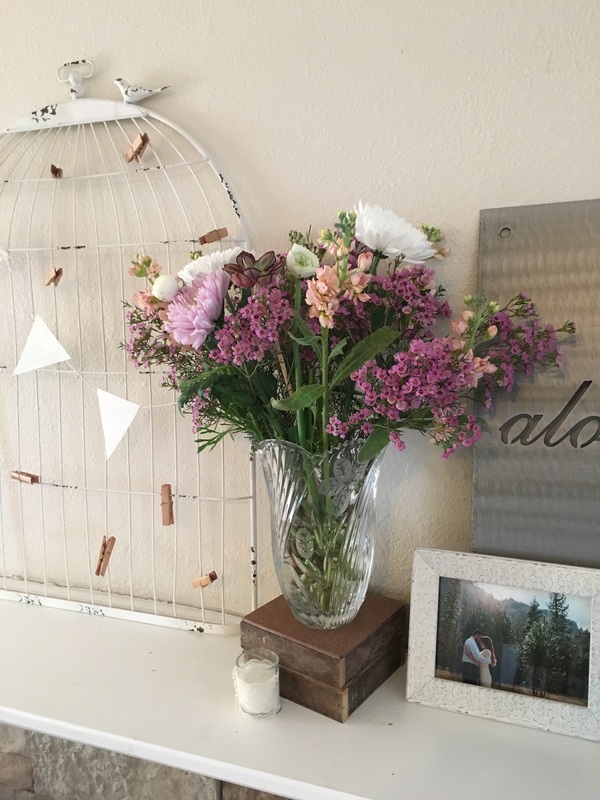 I am currently obsessed with creating my floral arrangements at home. I bought six spring arrangements at Trader Joe's and then combined them to create two large arrangements and several smaller ones. 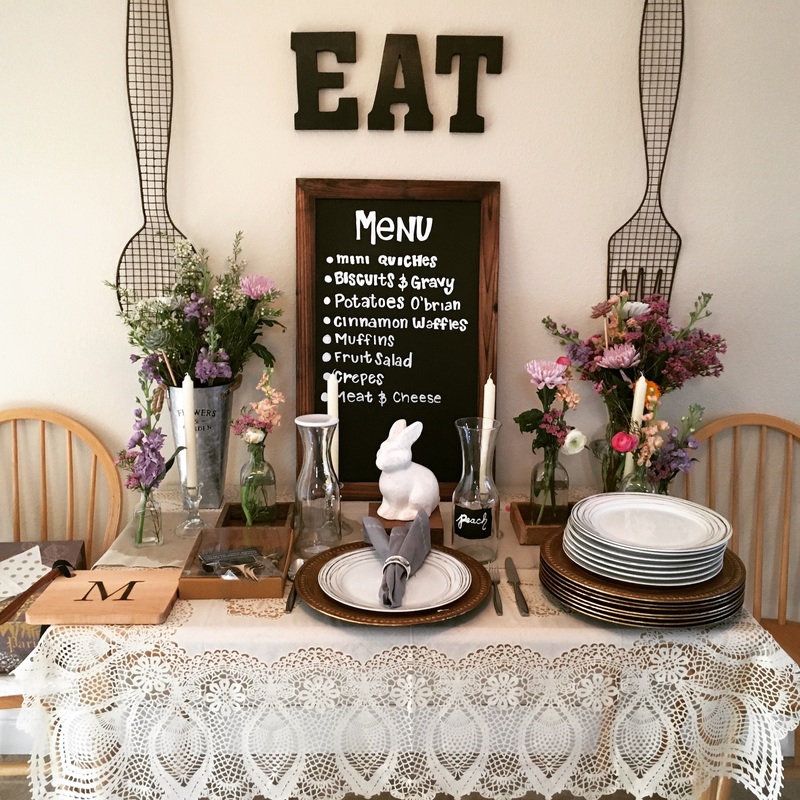 My gold chargers were a gift from our wedding, but you can shop them online at Pottery Barn. The napkins were handmade by my mother-in-law, she included my favorite garland print and our initials. 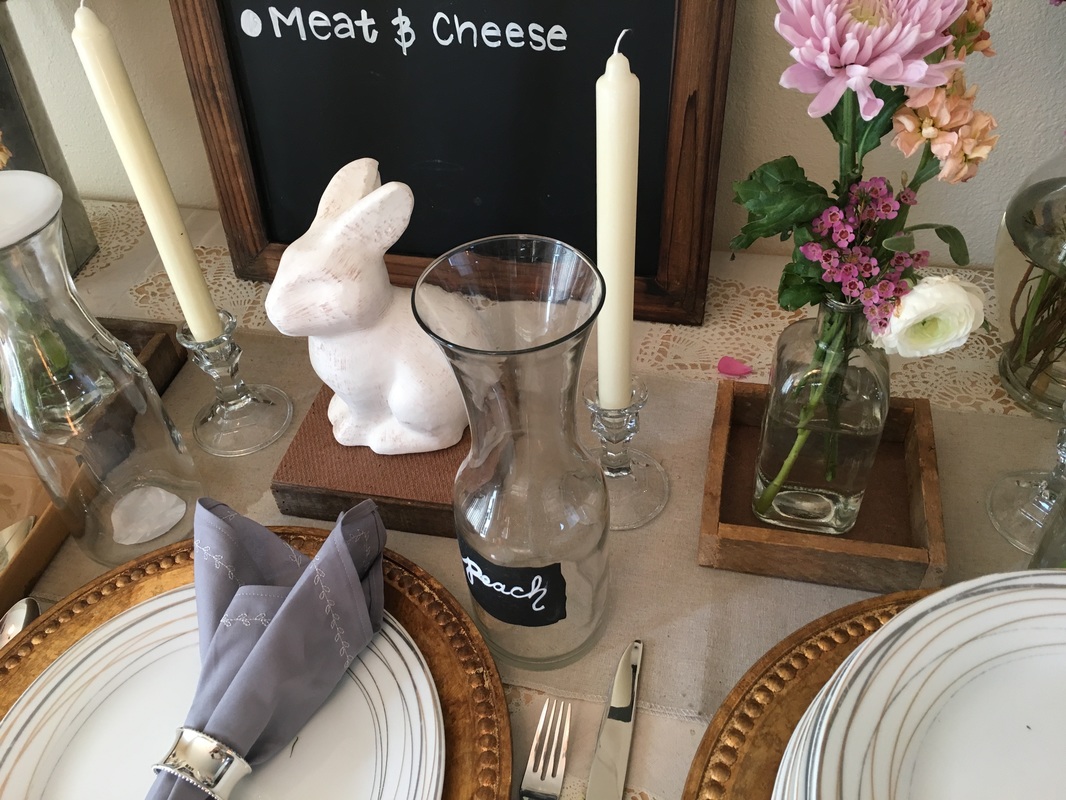 Does anyone else check the dollar bins immediately when you enter a Target!? Well, this girl does! You can find some pretty sweet deals including those glass juice containers I used for mimosa mix. They are versatile, and they were only $3! Can't beat that. The white bunny was also in the seasonal section at Target. 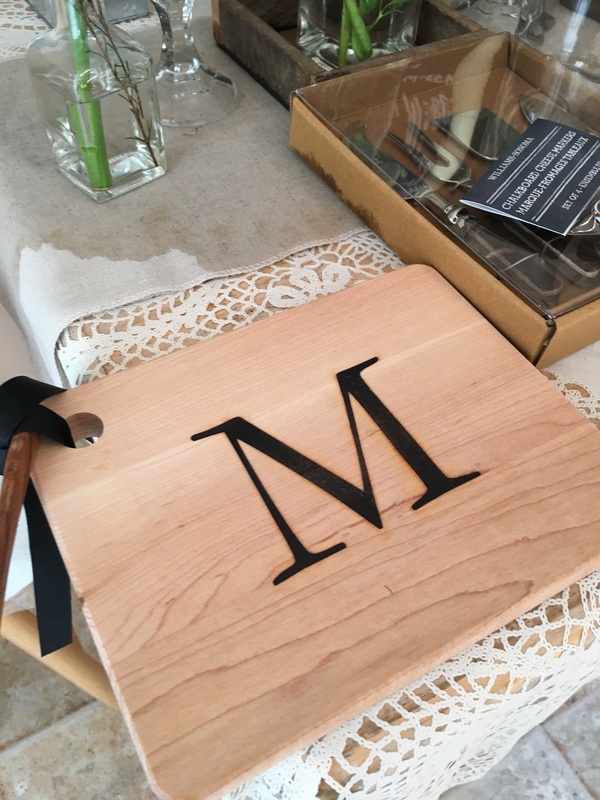 The cutting board was a monogram gift from William Sonoma. I love to use this to display cheeses and appetizers. Dresses up any evening at home! 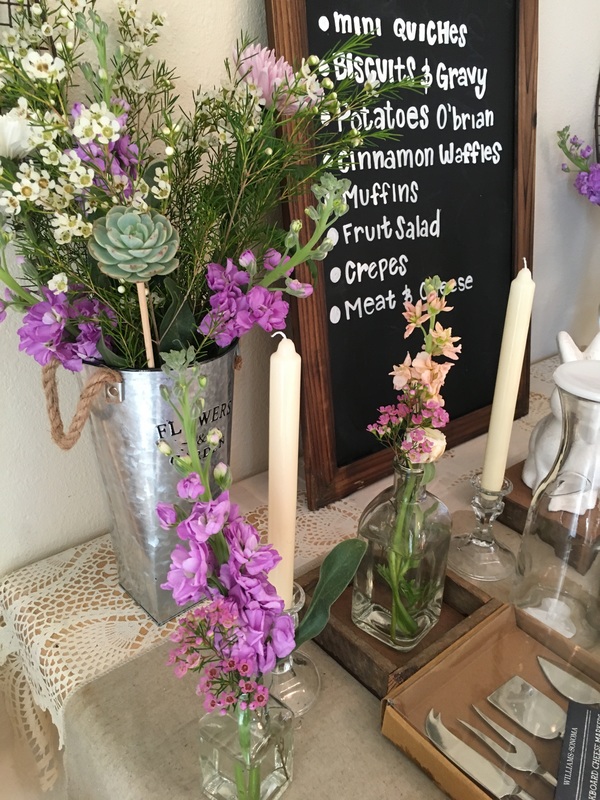 I wanted to add height to my table this year and went for two different sized flower vases and candlesticks. All of these, I found at Beverly's for a very reasonable price. I now use the vases all over the house whenever I have fresh flowers.
Stay tuned to see how I set up Brunch and check out my tasty menu. xoxo Tin & Twine
0 Comments
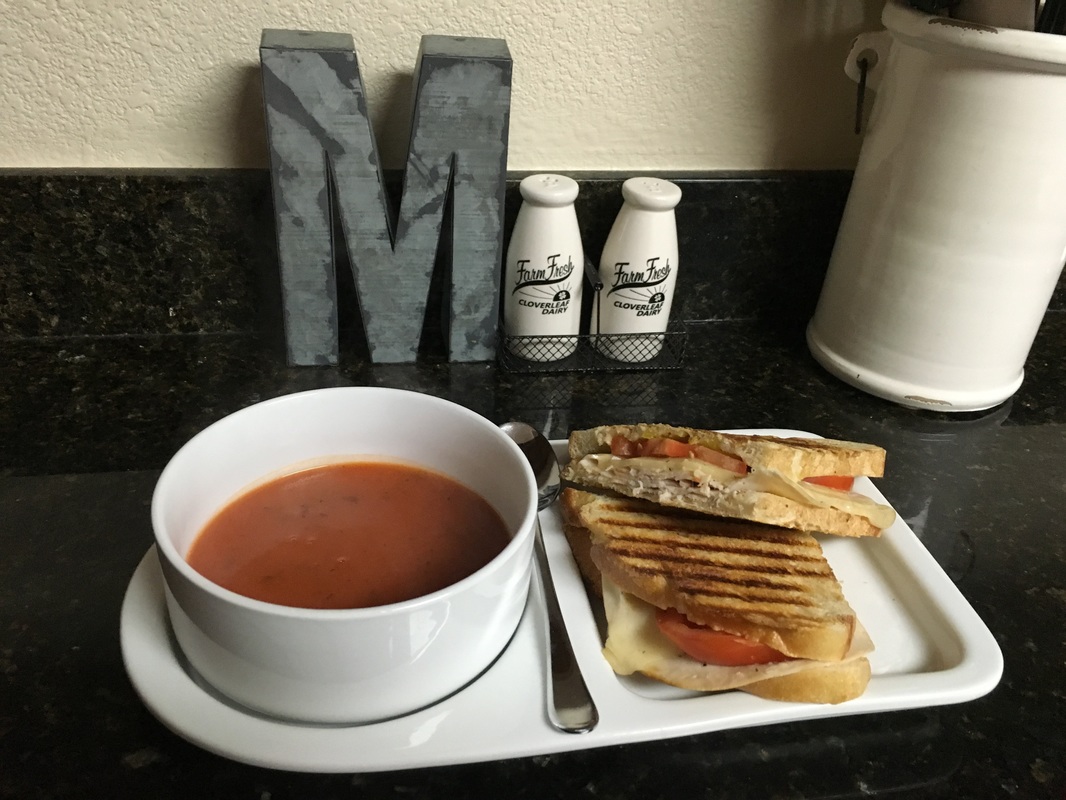 All the recent rain has made me crave grilled cheese and tomato soup. I put an adult spin on this kid classic and added some delicious ingredients. You can make grilled cheese with several variations. I love to add tomato and meat to mine. My advice is to add your favorite sandwich toppings and sauces then fry the sandwich in a pan flipping each side. I’ve also seen people use a waffle maker. I opted for our new Panini press from Crate and Barrel!  Ingredients Grill Cheese Sandwich Sourdough bread or your favorite sliced bread Horseradish cheddar (deli counter of Safeway) or your favorite cheese Sliced turkey or favorite meat Sliced tomato Sliced Pepperoncini peppers Mayo Sierra Nevada Pale Ale Mustard (Safeway) 2 to 4 tbsp. Butter 1 tbsp. Garlic Soup Favorite tomato soup, my favorites are Progressive tomato basil and Trader Joes Tomato soup. Parmesan Cheese Croutons Directions 1) Melt butter and add garlic, set this combination aside. 2) Heat a medium size saucepan and heat on medium/low pour tomato soup and stir frequently. 3) Heat a medium size skillet, your waffle maker or Panini press set to medium. 4) Take to slices of bread and spread the mayo and mustard evenly on both slices. 5) On one slice start to layer the toppings I typically start with turkey, next cheese then topped with tomato. 6) Sprinkle a pinch of salt & pepper on top of the tomato half. 7) Next, fork out a few pepperoncini peppers and place on the other half of bread that has the mayo and mustard. Put this half on top of your turkey, cheese, and the tomato half. 8) Take the sandwich and slather the butter garlic combination on both sides of the top layer of the bread. 9) Set one side of the buttered bread in the skillet to let it grill for a minute or so and check the bread with a spatula to see when the toast gets golden brown. 10) When one side is brown flip it over and get the other side brown. 11) Plate your grill cheese and slice your sandwich in half. Add your soup to a bowl and garnish with parmesan cheese and croutons. 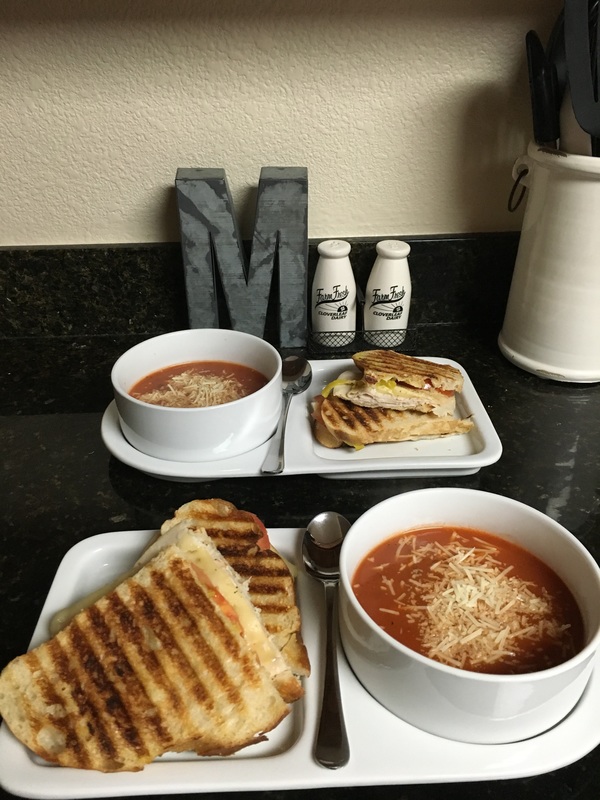 Ryan and I received our plate/bowl combo platters as Christmas presents. These bad boys have come in pretty handy. We use it anytime we eat a liquid side dish. Hope everyone enjoys their rainy weekend and catches up on their favorite Netflix shows. We are venturing to Fresno for some much-needed family time. Until next time!
Xoxoxo Tin & Twine 3/10/2016 0 Comments Thai Chicken Pasta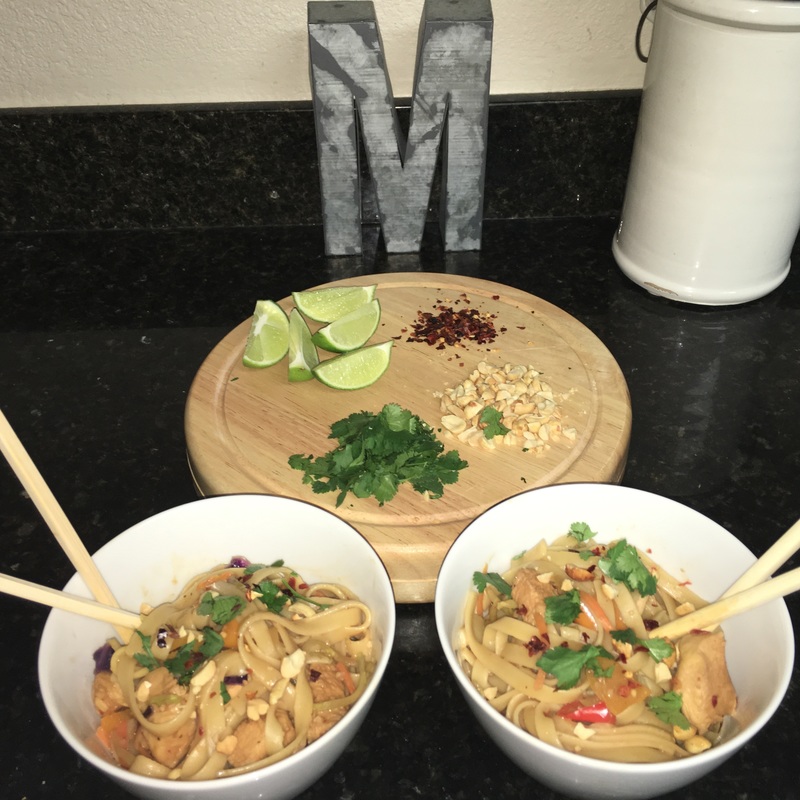 Ryan and I decided that each year for our anniversary we will plan a trip and travel somewhere we have never been before. For our first one, we decided to go to Thailand for ten days in September. I got so excited when we booked our flight to Bangkok that I decided to cook a Thai inspired pasta. Below are the ingredients I used but feel free to get creative and let me know what variations you create on your own! Thai Chicken Pasta RecipeIngredients 3 chicken breast - chopped in bite sized pieces Pinch of Salt & Pepper 1 tbsp garlic 2tbsp - sesame oil 1 box of pasta - (linguine or fettuccine) Sauce 2 tbsp peanut butter 1/2 cup soy sauce 1/4 cup brown sugar ¼ cup rice vinegar 2 tbsp Fish sauce 2 tbsp Huy Fong Chili Garlic Sauce 1 - 2 tsp Ginger root - grated Vegetables 2 peppers diced half a bag of sliced broccoli, carrot, cabbage mix (Safeway) or dice up your favorite veggies Garnish cilantro peanuts - handful crushed red crushed peppers lime Directions 1) Dice chicken and peppers into bite sized pieces. Next use a cheese grater to grate the ginger. Set aside the peppers and ginger for later. 2) In a large skillet combine sesame oil, garlic, salt & pepper and chopped chicken and cook on medium. 3) Meanwhile, in a large pot boil water and add a pinch of salt. Bring to a boil and add noodles. Cook for about 10 to 15 minutes. Taste test noodles to your liking. 4) While the chicken and noodles are cooking combine all sauce ingredients in a small bowl and whisk together. (peanut butter, soy sauce, brown sugar, rice vinegar, chili sauce, ginger). 5) Once you have cooked the chicken all the way, combine vegetables and sauce mixture. Saute on medium until peppers and broccoli mixture are cooked all the way through. 6) When the noodles have finished cooking, drain all the water and add the noodles to the chicken, sauce and vegetable mixture. Cook on low for about 3 to 5 more minutes. 7) Add pasta to bowl and garnish with cilantro, crushed peanuts and crushed red pepper. 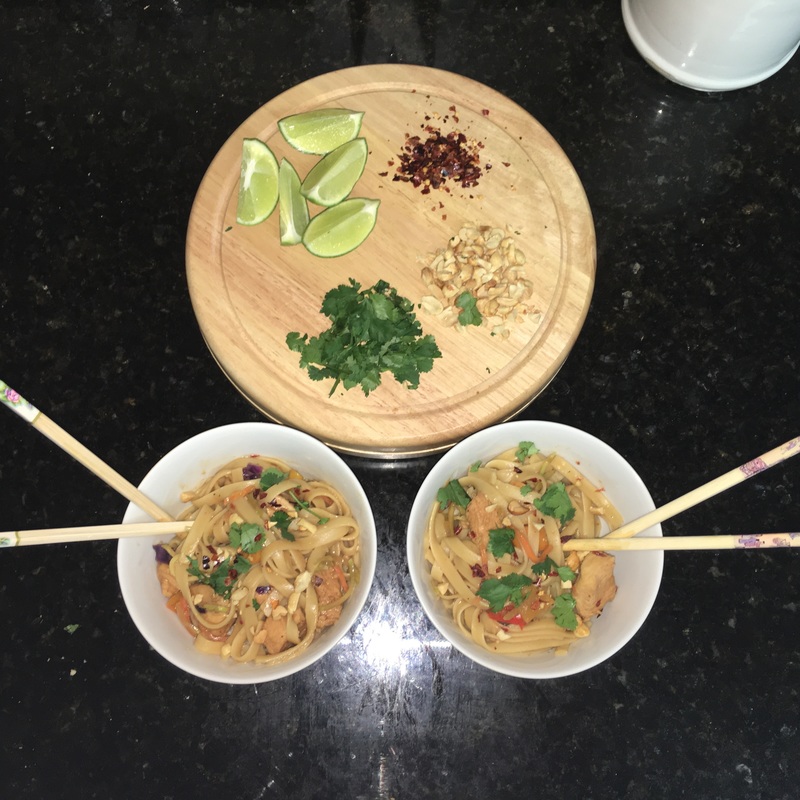 Warning this dish is a crowd pleaser. Let's just say this was a hit in our house as well as Ryan's work ;). If spicy food is your thing, then this is a dish for you! Be sure to add extra red crushed peppers and Sriracha sauce for some extra kick. Please come back and check out more recipes next week!
xoxoxo Tin & Twine 2/12/2016 0 Comments I Got You BAEThis Valentine season I curated packages of homemade goodies to hand out to some of my favorite people. Last night I baked, crafted and sipped on a little red wine while watching Netflix. Let's just say I was in my personal heaven! Ryan was out of town on business which meant I was left alone to do all things girly ;). The red velvet cookie recipe I found on the box of red velvet cake mix. Instead of making the mix true to the cake instructions you add the cake mix, two eggs, six tablespoons of melted butter and two tablespoons of lemon juice. (I omitted the lemon juice, and the cookies came out great). 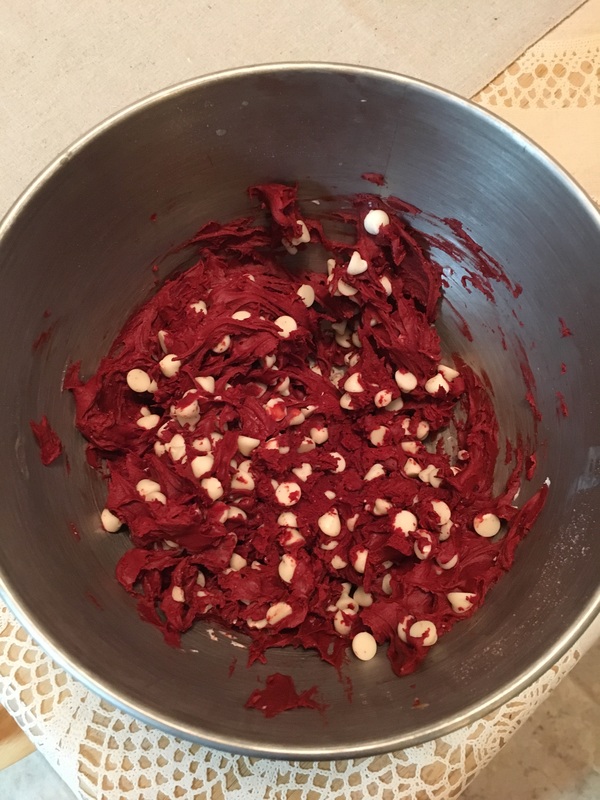 I added white chocolate chips to my cookie batter mixture. During this step, you can get creative. Add your favorite chocolate chip, sprinkles, nuts or candy. You can also keep it simple and just bake the red velvet cookie mixture by itself. Once the cookie dough is mixed, use a spoon or your hands to roll the dough into small balls. Place on a cookie sheet. Insider Tip: to prep your cookie sheet pan, line the pan with foil and spray Pam or spread your personal choice of oil (olive, coconut, vegetable or even butter). Once the cookies are done baking, clean up is simple, just toss the foil and you are done! 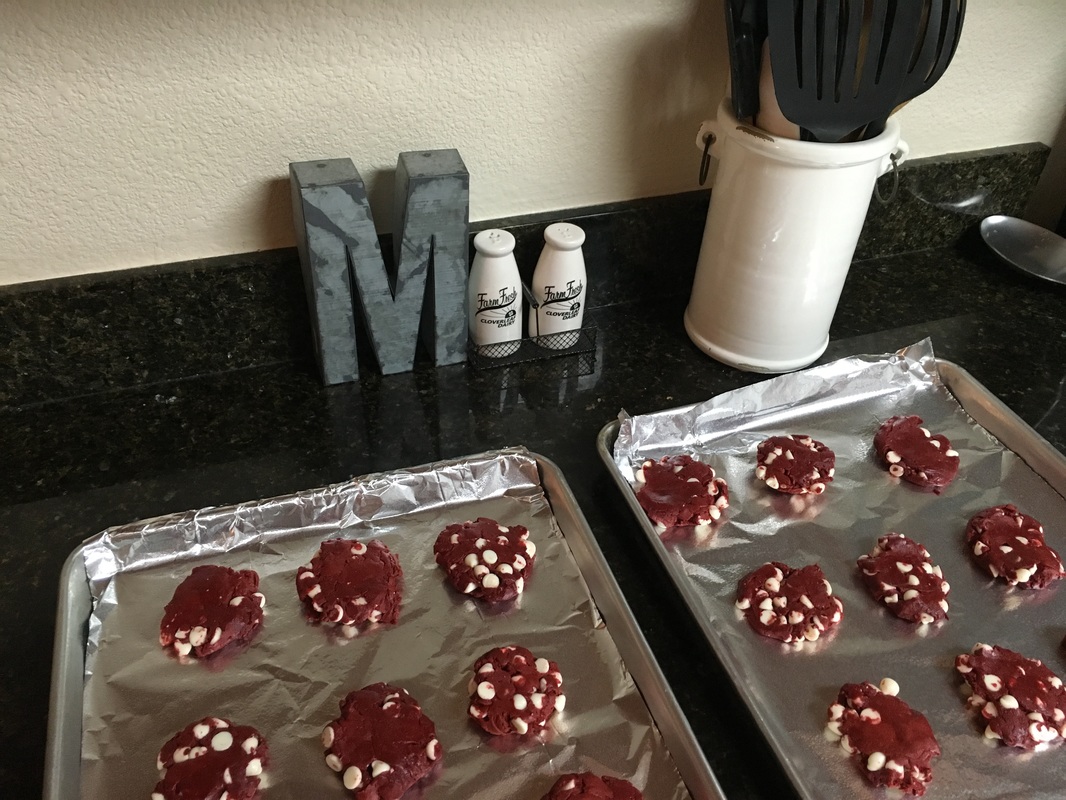 Get Your Craft On To package the cookies I used the following craft items:
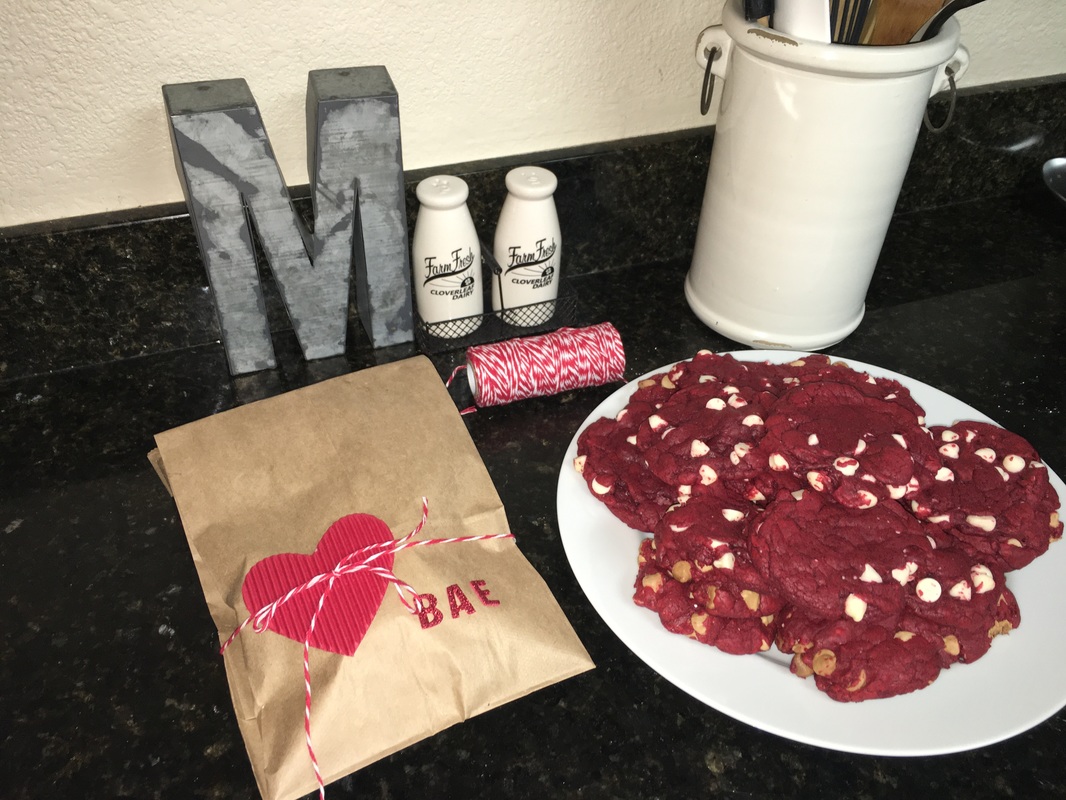 How To: Step 1 - From patterned craft paper cut out hearts and squares. Step 2 - Use a glue stick to apply your cut out pieces to the paper bags. Step 3 - Fill with your favorite goodies. Step 4 - Roll the top of the bag, fold and secure with wasabi tape. Step 5 - Hand them out to your fav peeps and love ones. 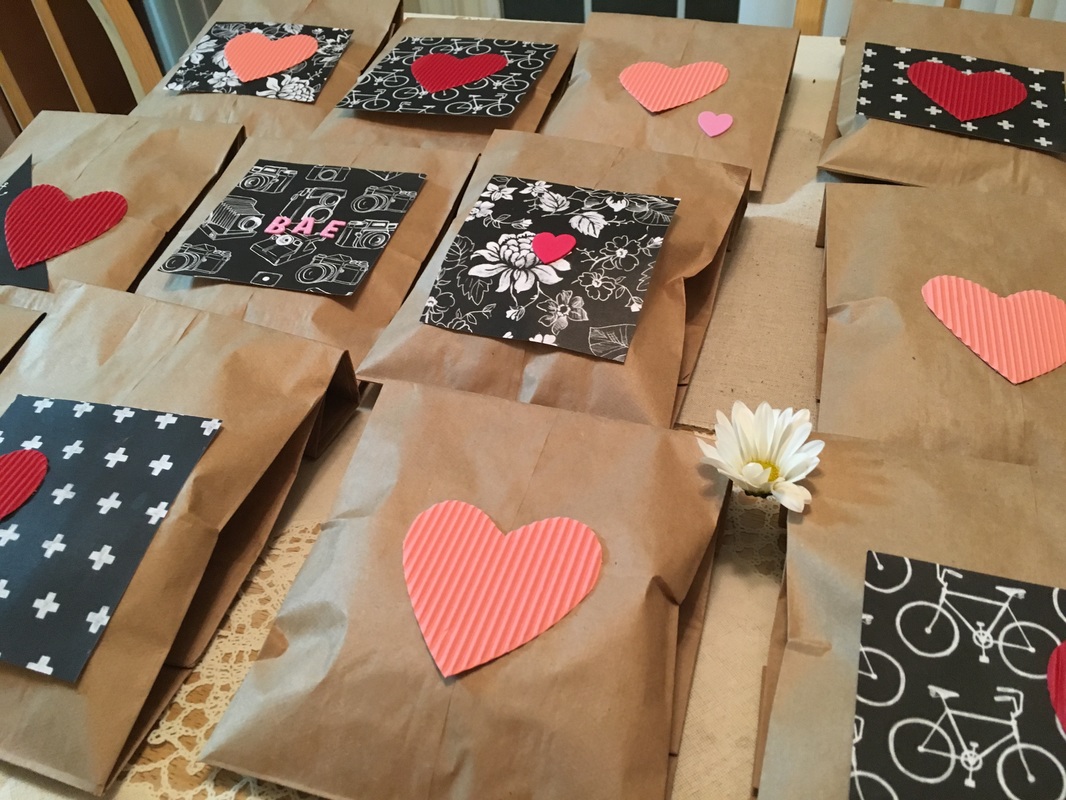 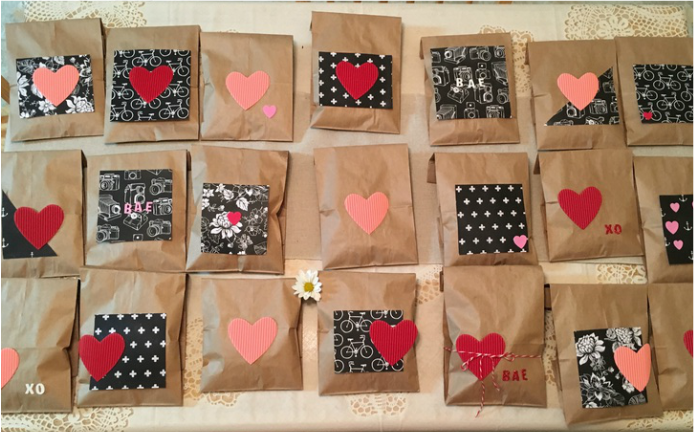 Have a great Valentine's Day and make sure to spread some love!
xoxo Tin & Twine Yesterday, I posted my chayote squash recipe I hope you all get a chance to try it with your favorite meat and starch in the coming weeks! I wanted to share what we cooked alongside this delectable vegetable. Ryan and I have been trying to stick to just having meat and vegetables for dinner, but plan ground turkey can get repetitive and dull. We gave our turkey the kick it needed with chipotle pepper sauce and smokey chipotle grilling salt, both of which can be picked up at William Sonoma. 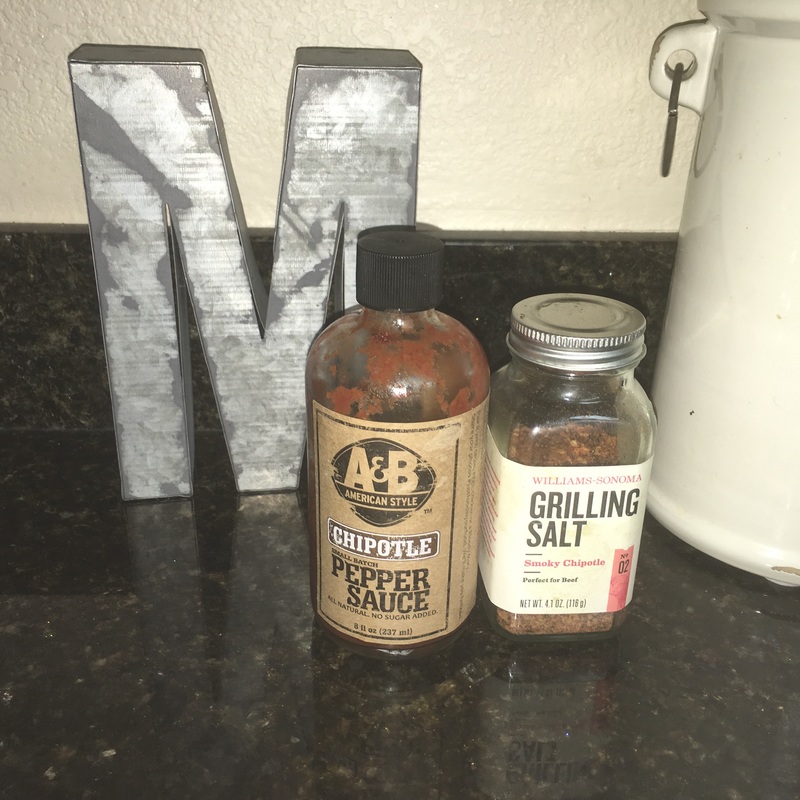 When it comes to cooking, I'm not one to follow a recipe to the T. Instead, I make it my own, which typically results in me adding a bunch of crushed red pepper to make the dish SPICY! I encourage you to make this recipe your own. Turkey is perfect for soaking up any flavor you apply to it. Use what you have on hand, whether it's a BBQ rub or sauce I'm sure whatever you through in the skillet with the turkey will taste amazing! 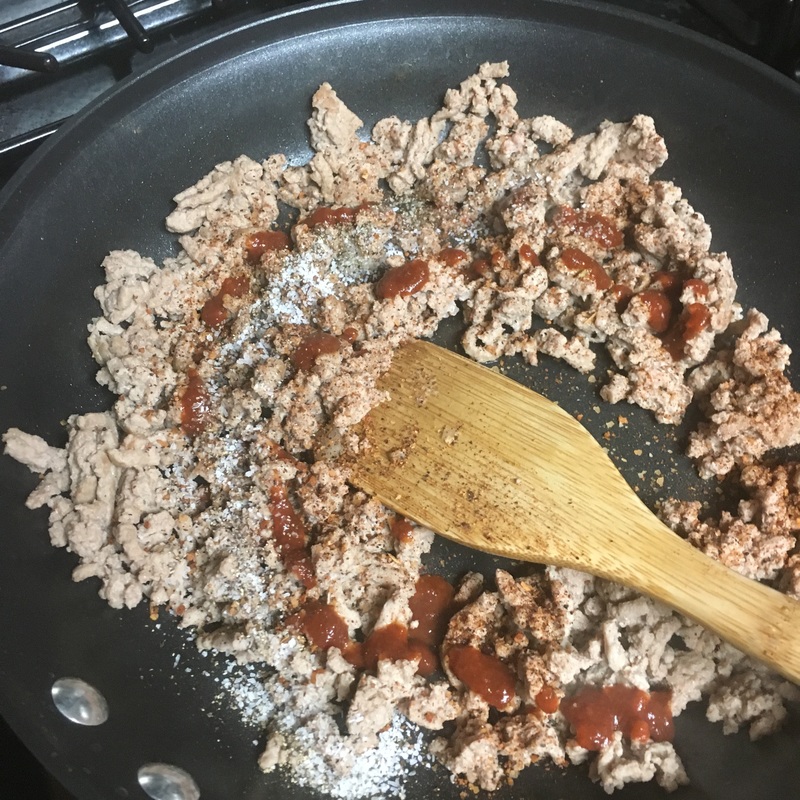 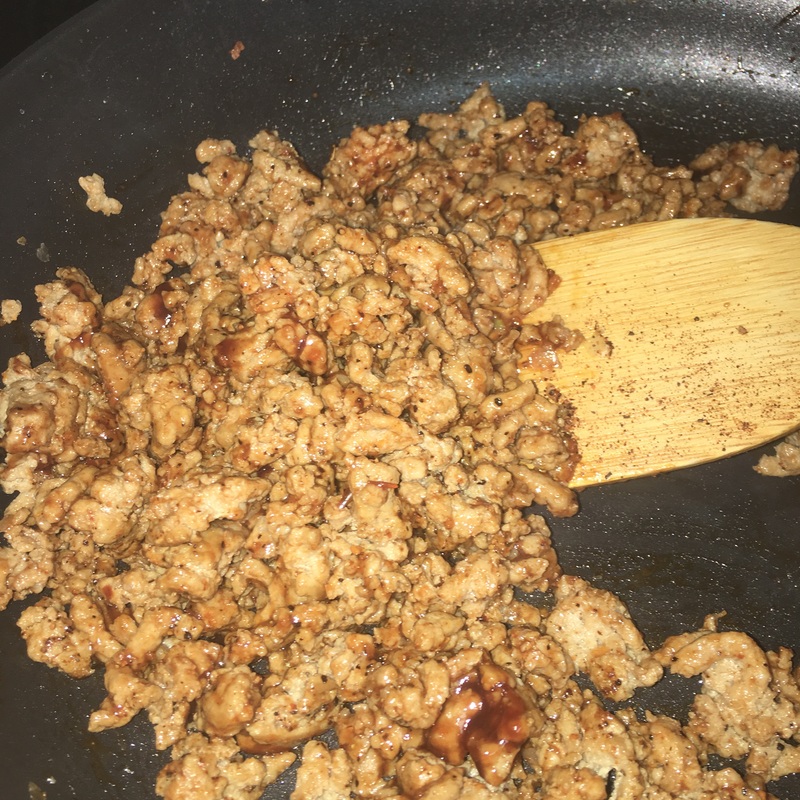 Lately, we have been adding a fried egg to almost every dinner. So if your feeling egg-tra ambitious fry up an egg and add it to your plate. I topped the mesquite turkey, chayote squash and fried egg with some parsley and red pepper flakes. 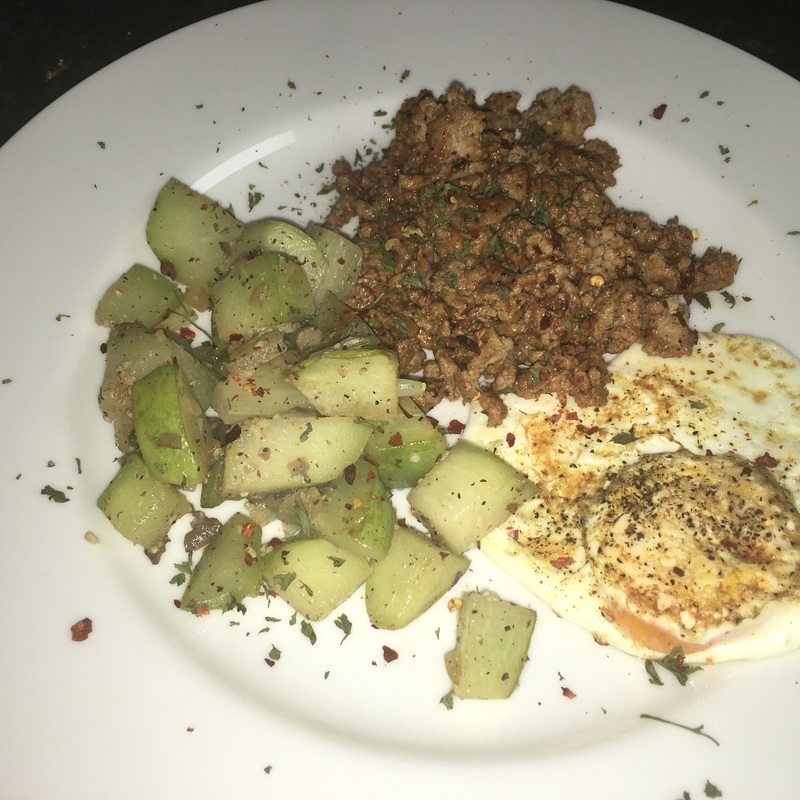 No dinner is complete without an adult beverage. Faithful to my roots I chose a cold Sierra Nevada Pale Ale. Grab your go-to drink, cheers your roomie, sweetie or feline friend and enjoy this easy and delectable dish!
2/11/2016 0 Comments Chayote Squash Recipe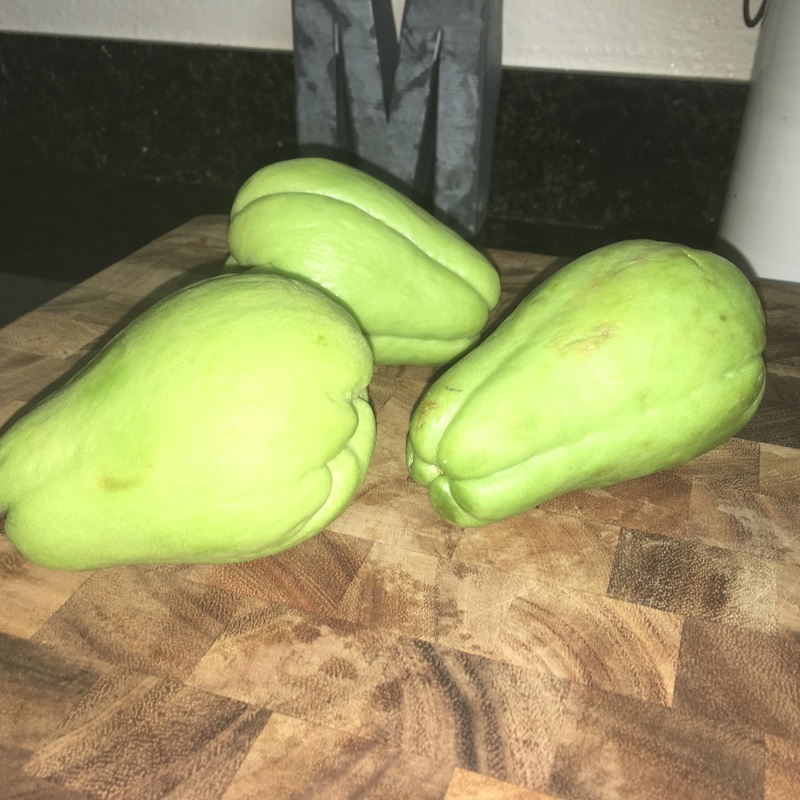 Has anyone else come across this odd looking squash in the veggie aisle? I'd seen it a couple of times while picking up my usual suspects (broccoli, kale, green beans and asparagus). The chayote squash is an edible plant belonging to the gourd, melon, cucumber and squash families. To me it looks like a prickly pear and definitely has a sweet squash like taste. 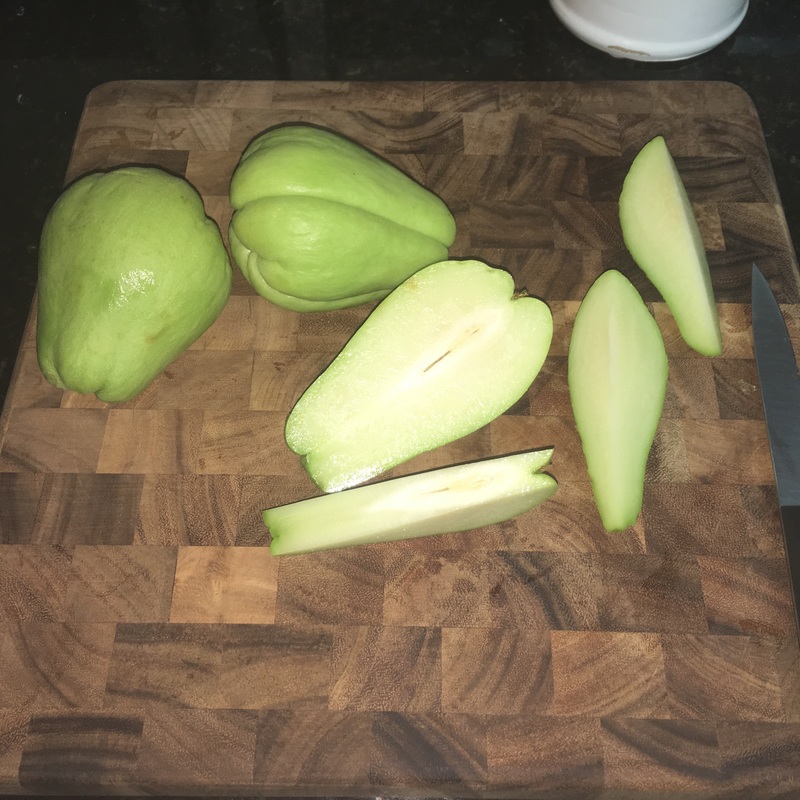 I decided to pick a few up and give this vegetable a try. I wanted to keep it simple for my first attempt, so I opted to sauté the squash with a few other ingredients. To start, I rinsed off the the squash then sliced it in half. When you cut it open you will notice a small seed like pocket. I chose to cut around the center and discarded those pieces. Next, I chopped the slices into small block pieces and set it aside. 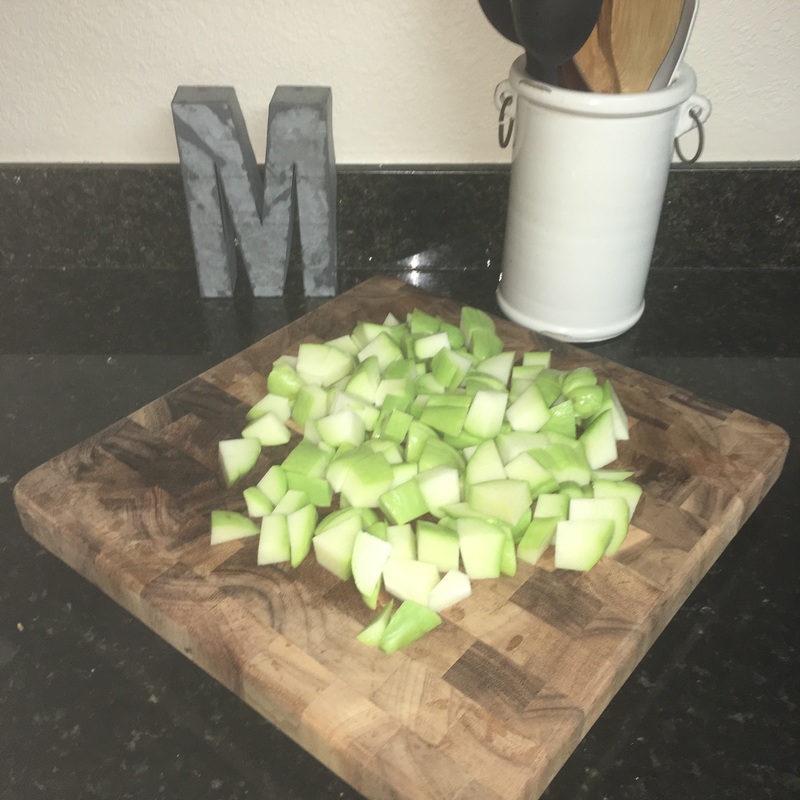 To add flavor to the squash I chopped half an onion, diced a handful of mushrooms, included a touch of minced garlic and sprinkled a pinch of salt and pepper. 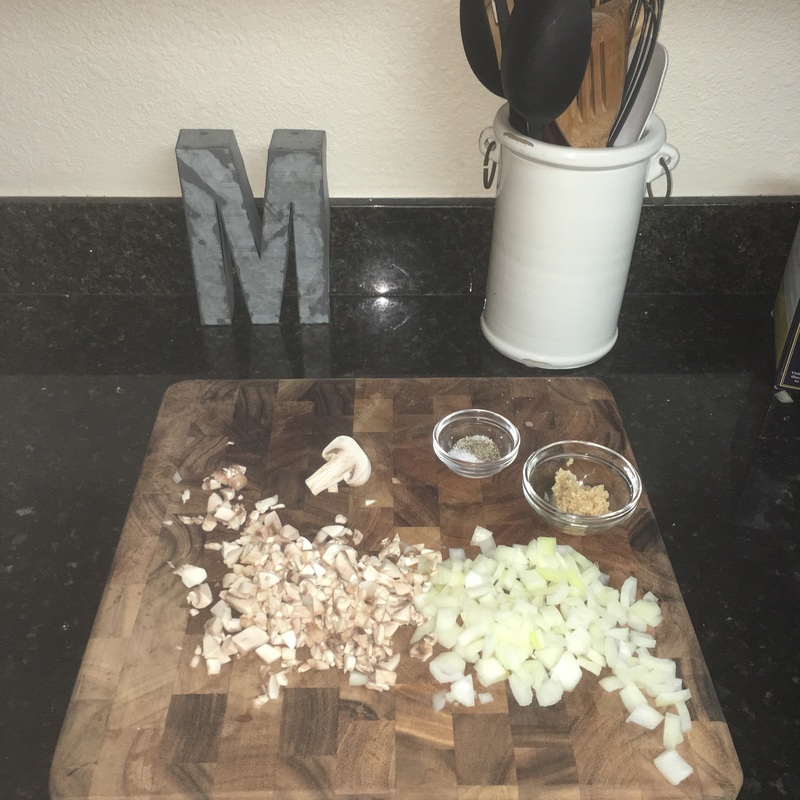 When all my prep work was done I swiveled some olive oil around in a hot skillet and added the squash, onion, mushroom, garlic and salt and pepper to the pan. 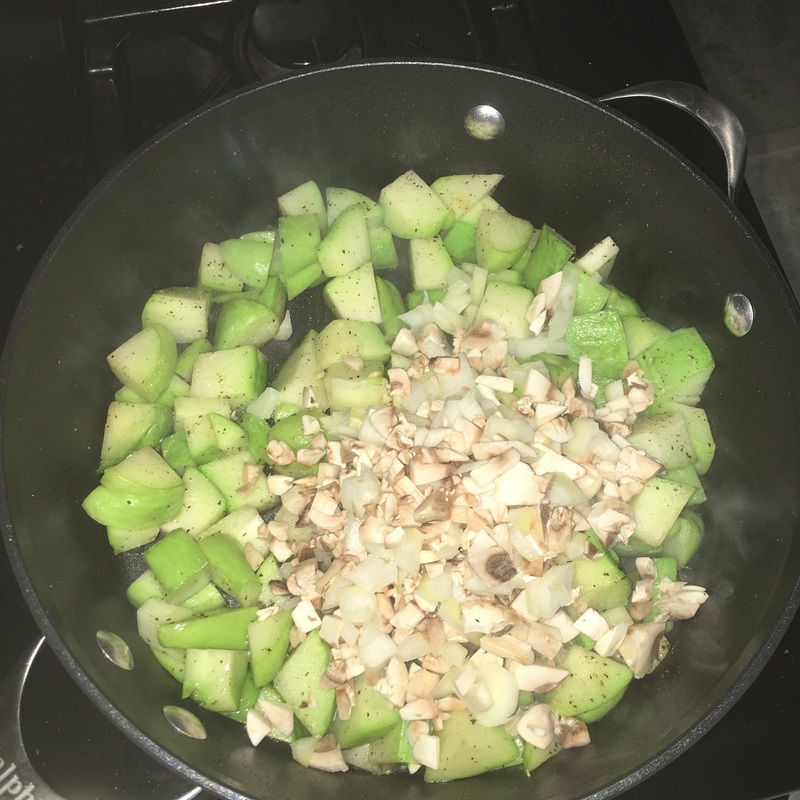 I let this cook for about 20 minutes making sure to stir the ingredients every few minutes to avoid burning. After 20 minutes the squash should be soft to bite into. I recommend trying a few pieces before serving.  1/14/2016 0 Comments Ain't No Party Like A Gatsby PartyThis NYE, we decided to throw a Great Gatsby inspired party and have a few of our closest friends over to ring in the New Year. I threw this party together in about a week and had way too much fun redecorating the house! I always start my planning process by collecting creative ideas and this ritzy affair was no different. By creating a New Year Pinterest board to gain inspiration, I was able to plan out my food menu and decor details. I also took inventory of what I had! Since, I recently got married, my inventory of decor is currently overflowing our garage (which my husband isn't too keen on). I decided to use a white chalkboard I had on hand and wrote a quote from The Great Gatsby, by F. Scott Fitzgerlad. The Cheers sign I made for our engagement party and was excited to reuse it during the New Year to decorate my mantel. The paper lanterns I found at Beverly's. We received the crystal vase as a wedding gift, which added a hint of art deco. The black mirror was purchased from Ross years ago but makes for a great accent piece. All the lovely blooms are from Trader Joe's, which is a great place to pick up flowers, they always have a fresh in season assortment and tend to be less expensive. I picked out 2 bouquets, a couple of green leafy stems and several bunches of white flowers to assemble my own arrangements throughout the house. I used a few black feathers to add a 1920's twist to a more modern arrangement. 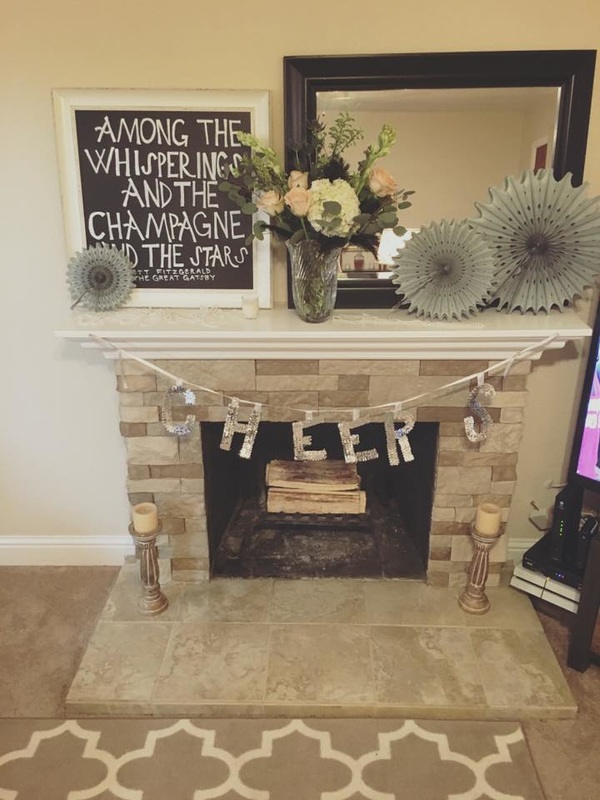 One of my favorite spots in my house is our bar, which is conveniently located when you enter our home. Most guests are greeted with a cocktail ;). The picture frame was spray painted gold and the chalkboard was stapled onto the back for a quick DIY glam piece. I went back and forth on what to write but eventually decided on Speakeasy. I looked up fun fonts on Pinterest and mimicked this art deco font. Fortunately, I have fabulous friends who threw me a gorgeous Great Gatsby styled bridal shower back in June. I was able to use a lot of the decor including these adorable vases and stackable hat boxes. Pearls are essential for any 1920s themed event, I found a bag of long strands on Amazon. Insider Tip: You can spray paint almost anything gold to make elegant accent pieces. For example, my friend Monica simply spray painted these inexpensive vases from the dollar store and Michaels. The hat boxes were brown craft boxes before and she painted them black and gold to give it a 1920's glam feel. 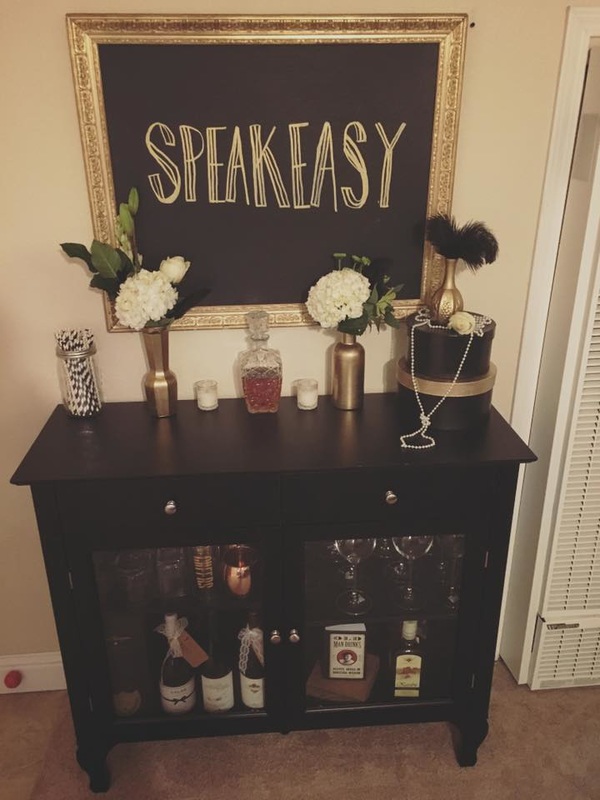 I am obsessed with photo booths and couldn't help myself for this event! I used black paper to create a solid backdrop and pinned a strand of gold streamers over it. The 2016 glitter sign tied it all together for a NYE photo op.  Our Great Gatsby Attire was pretty inexpensive. I got my dress and headband from Amazon. Ryan was fortunate enough to receive a free suite from Men's Warehouse because his groomsmen rented a certain amount of tuxes. Who knew it'd come in handy so soon! 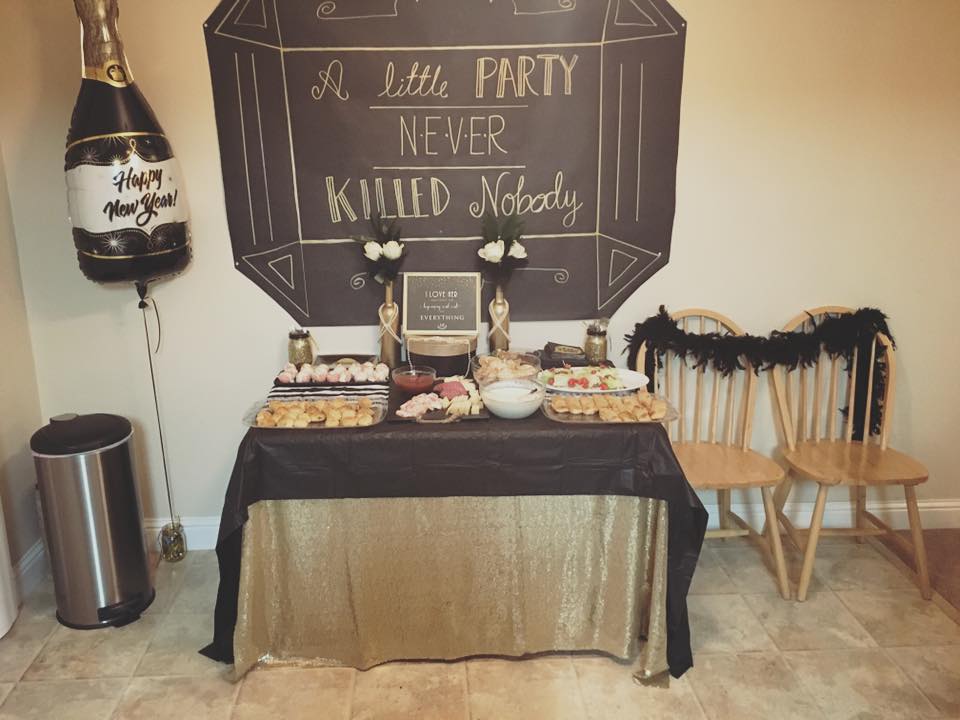 One of my favorite things to do is cook for a crowd. Guests never leave my home hungry. For this event I made the following items: Sausage Puff Pastries Bourbon Meatballs Buffalo Eggrolls Wedge Salad Bites Taco Cups Champagne Cake Balls 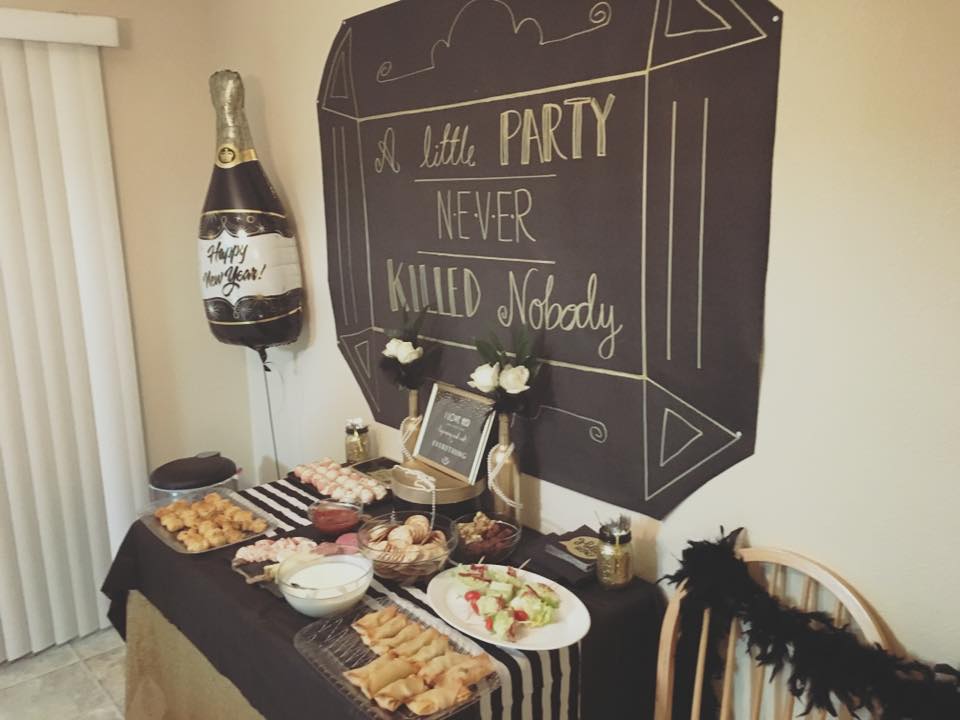 No party is complete without some adult beverages! My husband and his friends are all about whiskey gingers, so, of course, we stocked up on ginger ale and Bulleit Whiskey. I personally sipped on champagne all night. 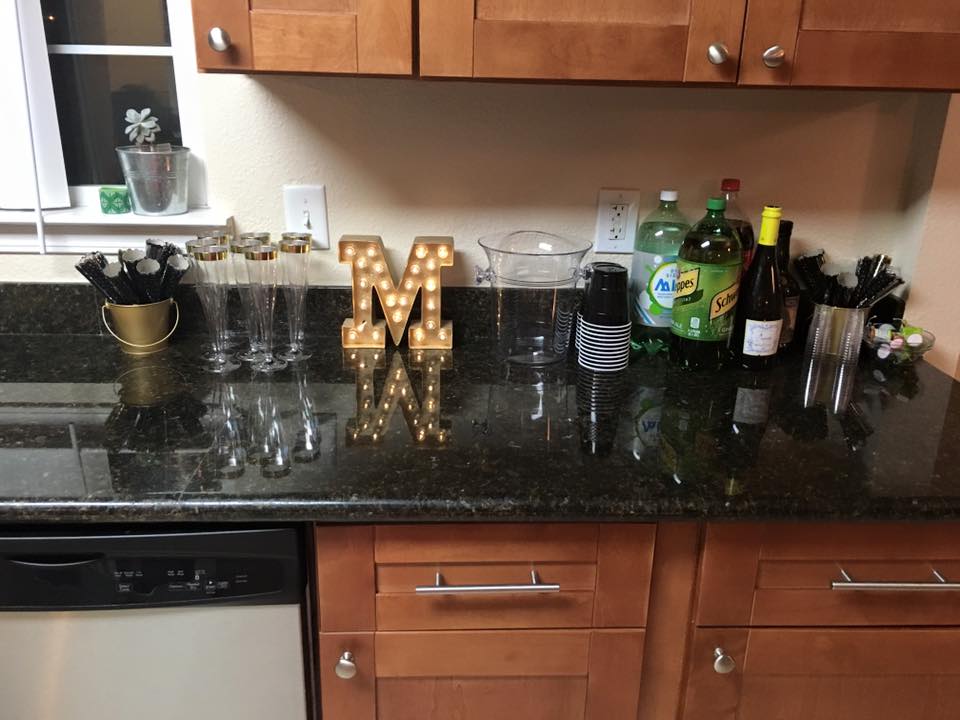 We lucked out on weather that night, it didn't rain and it wasn't too cold. Thankfully, we have a patio heater which kept us girls toasty in our dresses. The party was able to go in and out of the house comfortably. All in all, it was a lovely evening shared with great friends. We wish everyone a Happy New Year and we can't wait to see what 2016 brings us! Cheers and blessings, Tin & Twine 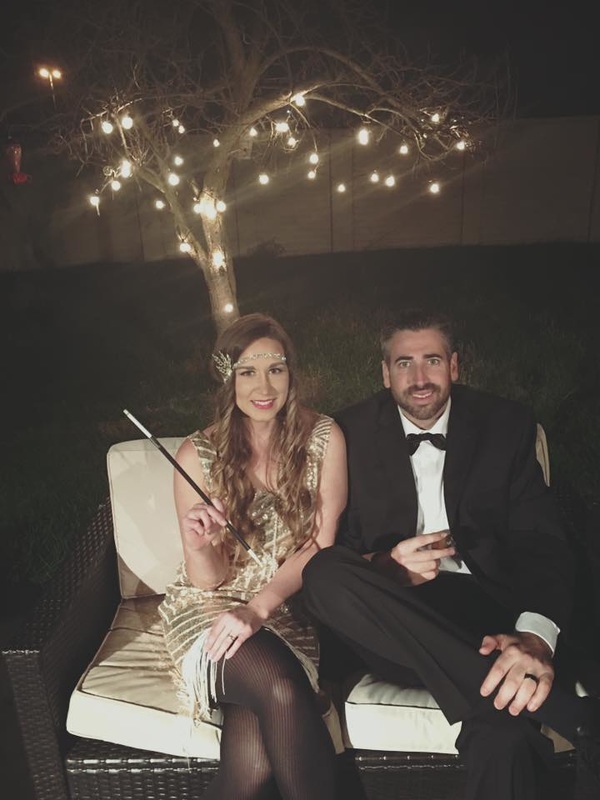 12/15/2015 1 Comment The Best Day Ever!This past September, Ryan and I got married in Fresno, CA. We chose Fresno for several reasons. 1) His parents had recently moved to the area. 2) The Fresno area is much cheaper than the San Francisco Bay area. Which meant, I got to stretch my wedding budget a lot further. 3) We genuinely fell in love with our venue! Holland Park West offers a beautifully landscaped outdoor ceremony and reception area. All food is prepared onsite in a buffet setting. The reception area has an overhang with fans to help cool down guests during the summer months. What really sealed the deal for us was all the unique rustic pieces throughout the property. A wood and metal shack stands in the back reception area, adding a bit of charm. Hidden to most guests, an old train car sits in the back parking lot, it's perfect for taking photos. We used the enclosed rock area for our dance floor. All our guests could not stop talking about how great our venue was. 9-5-15 went by WAY too fast, but for Ryan and I it was the best day ever! We can not wait to see what our future holds. 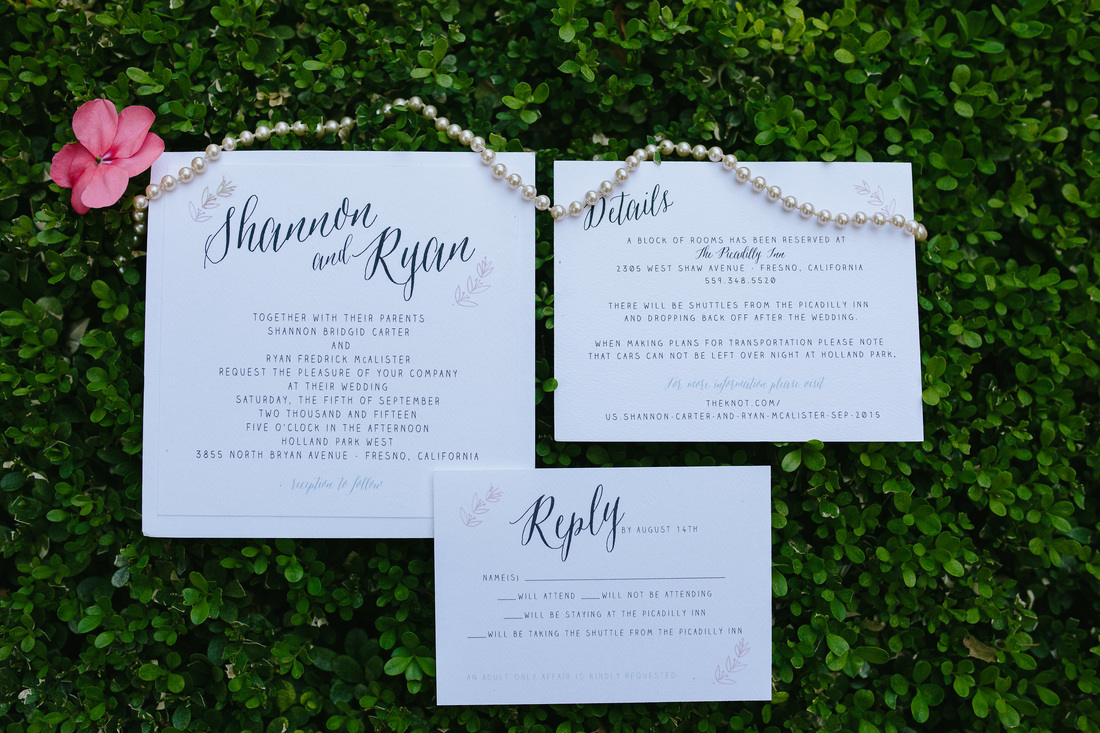 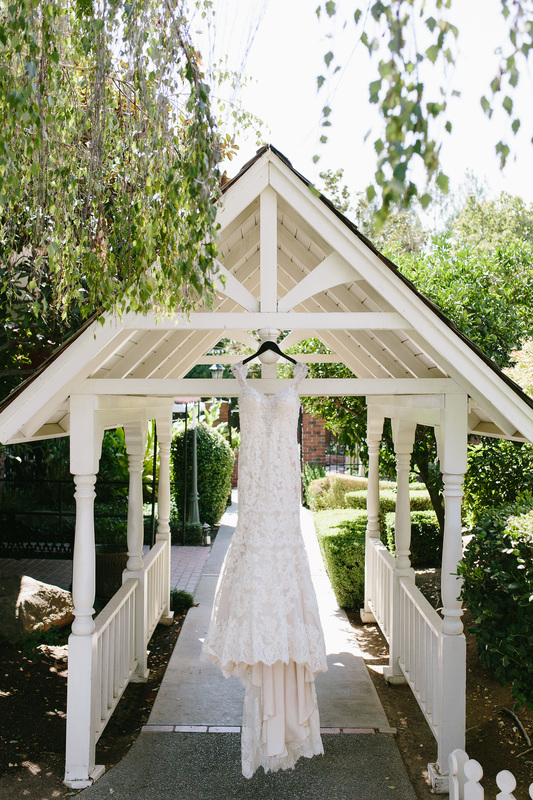 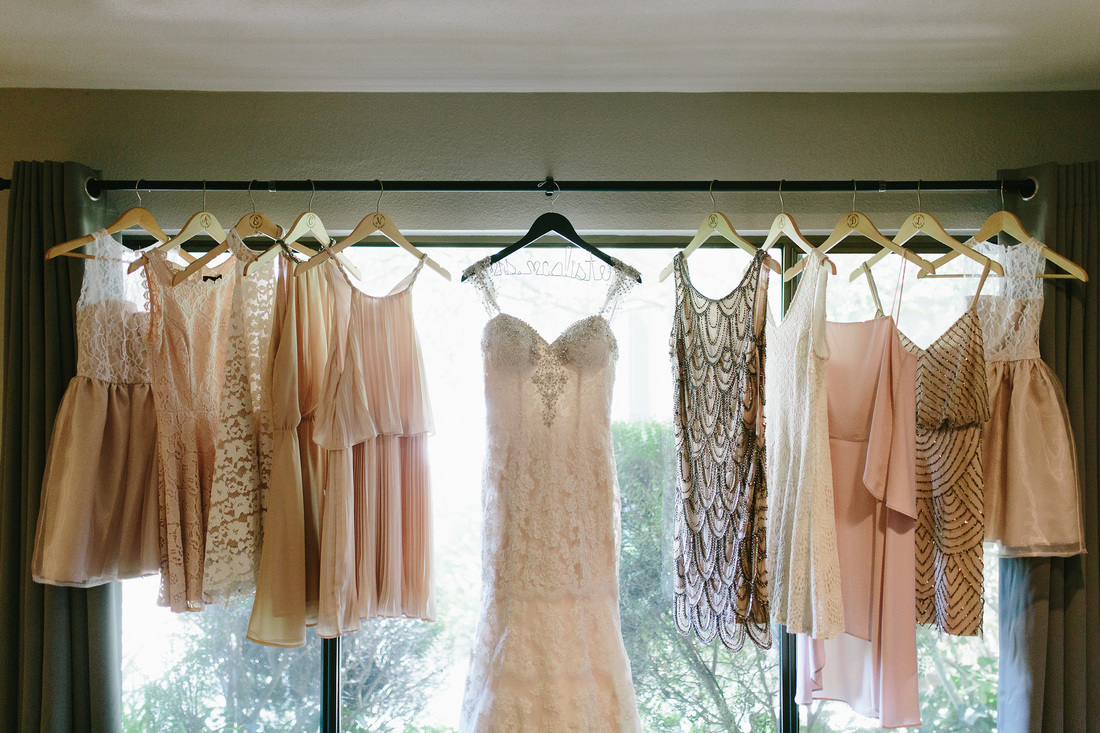   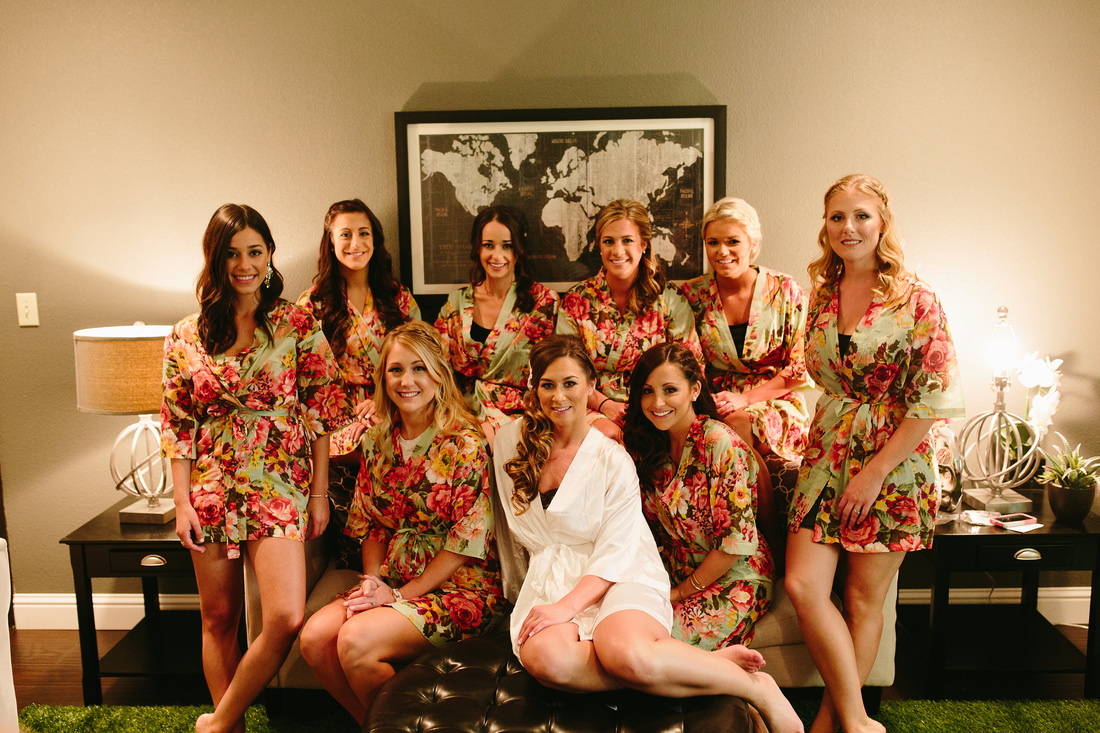 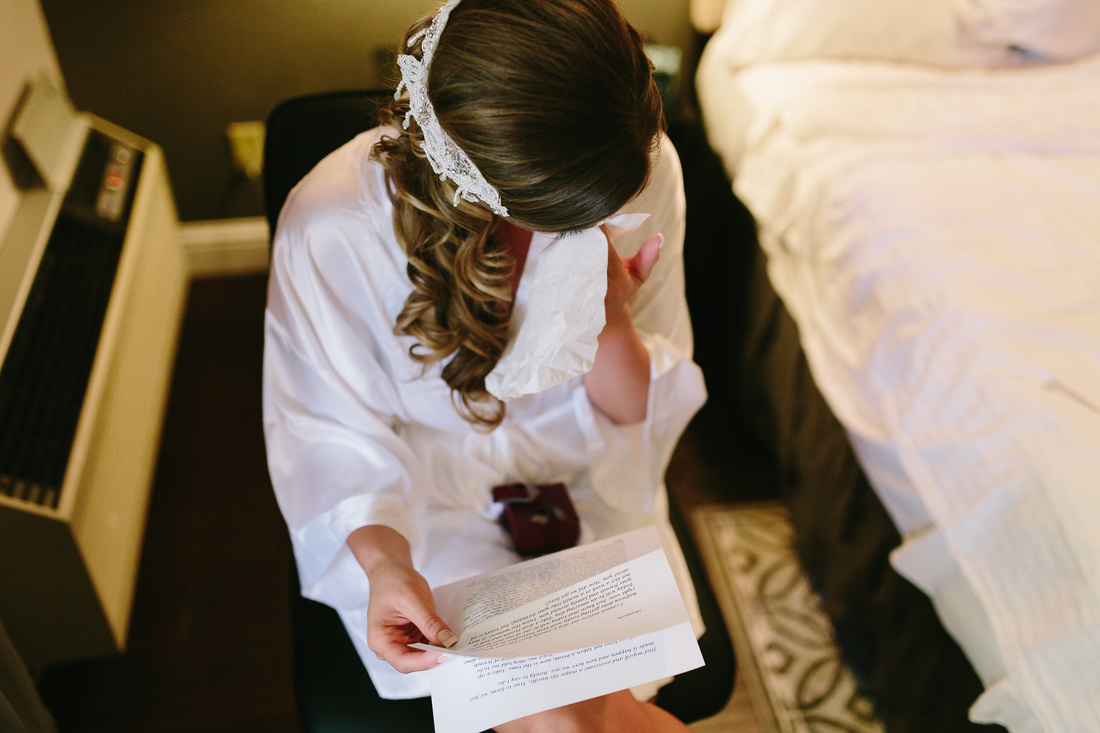   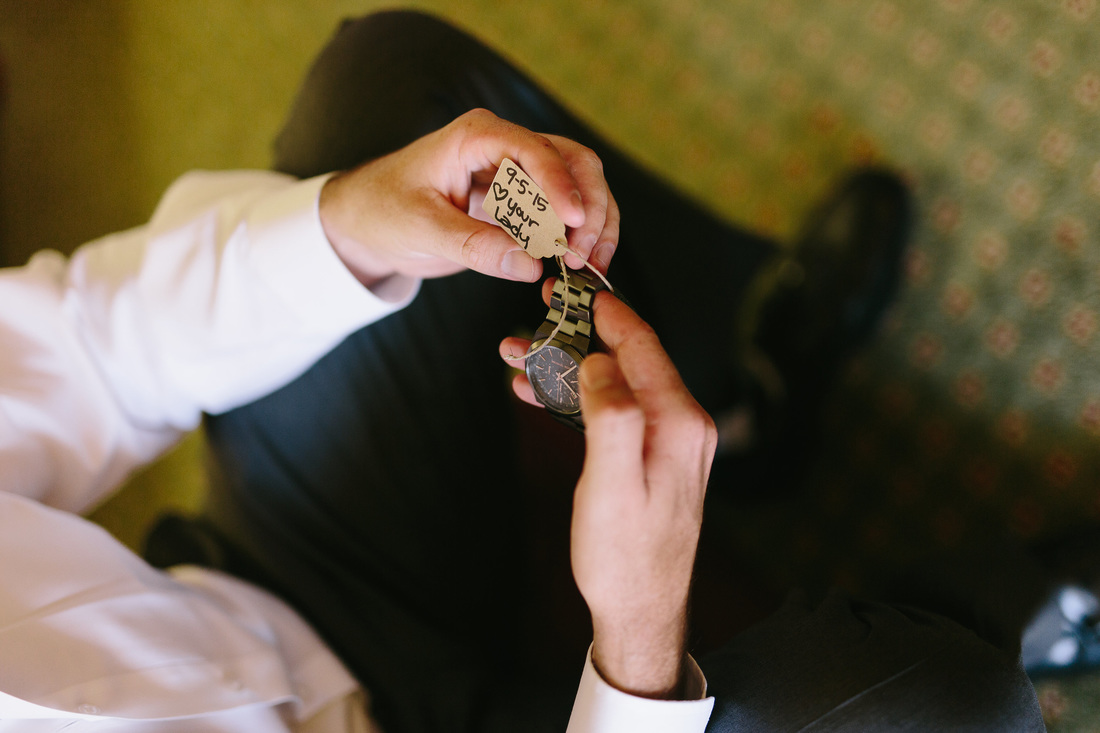      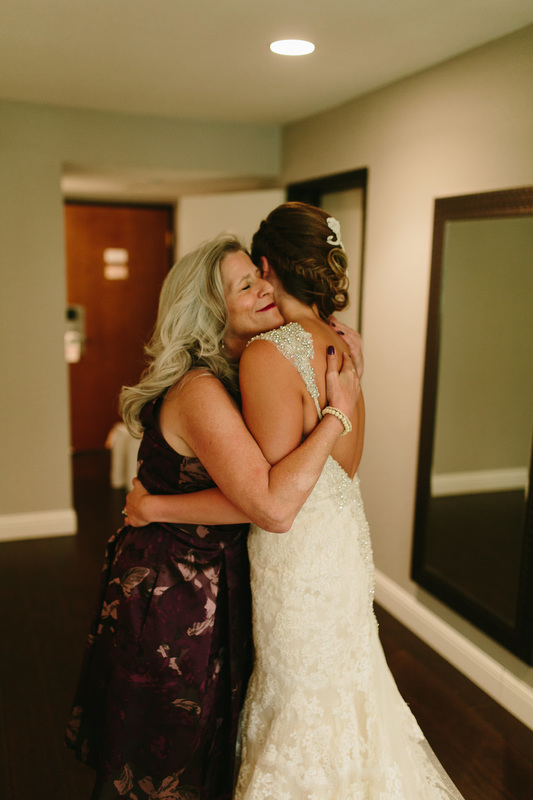 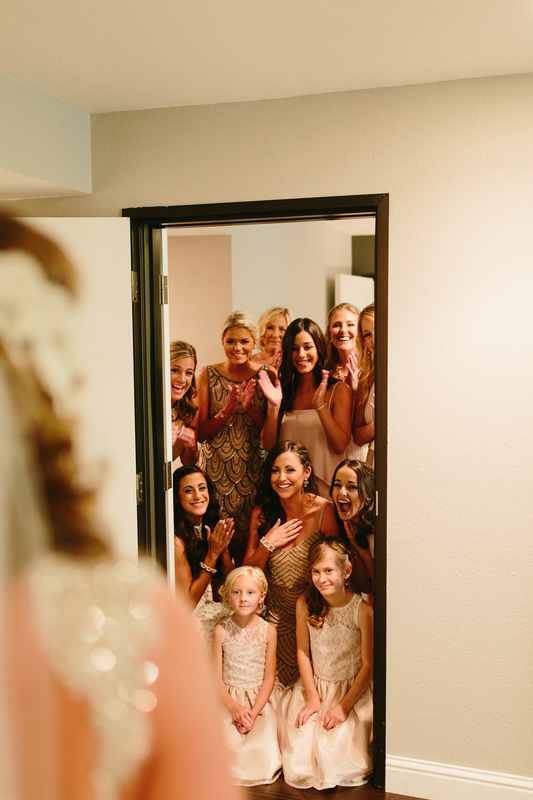 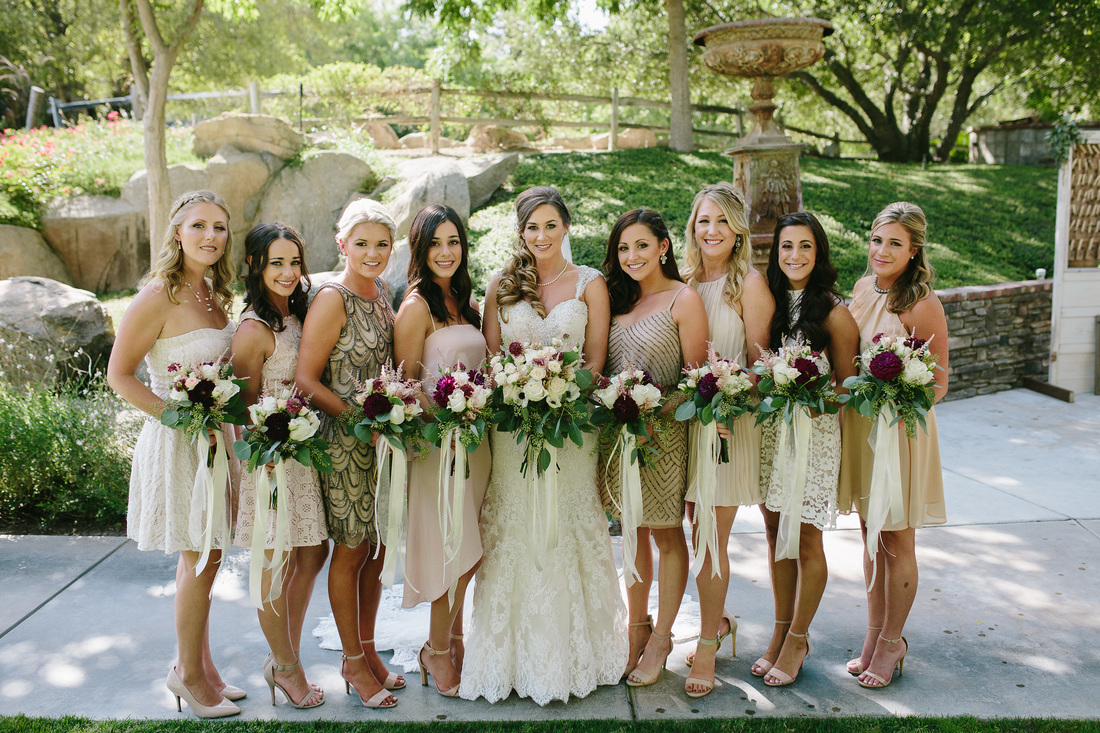 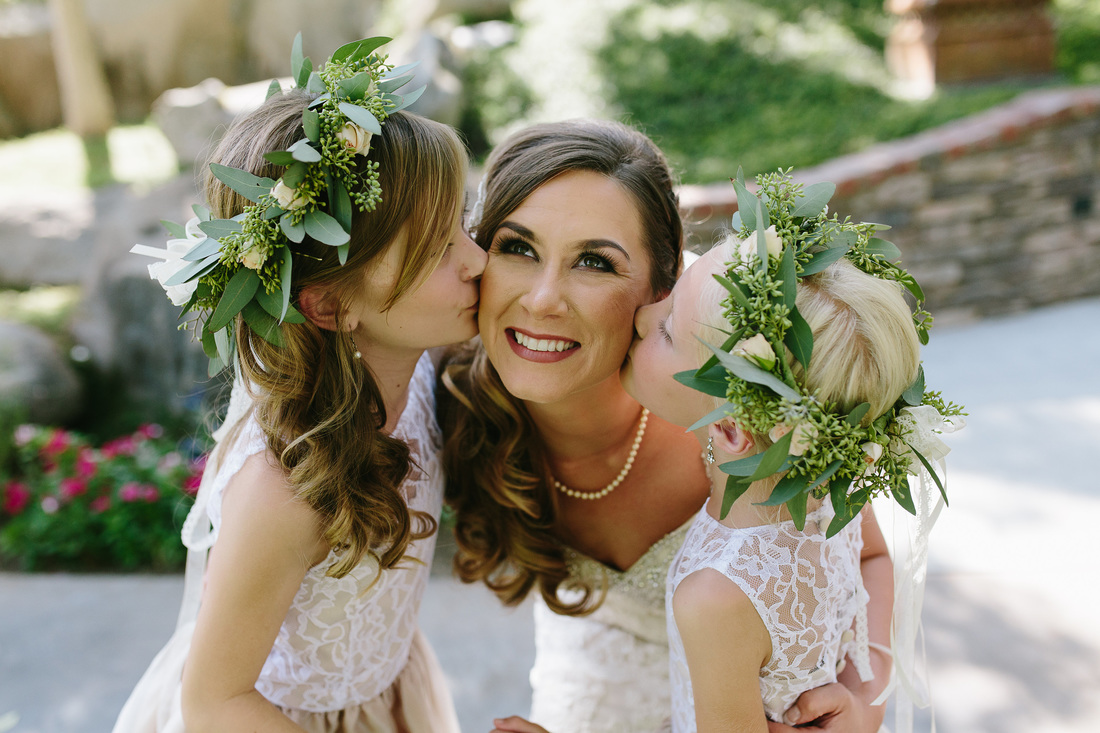 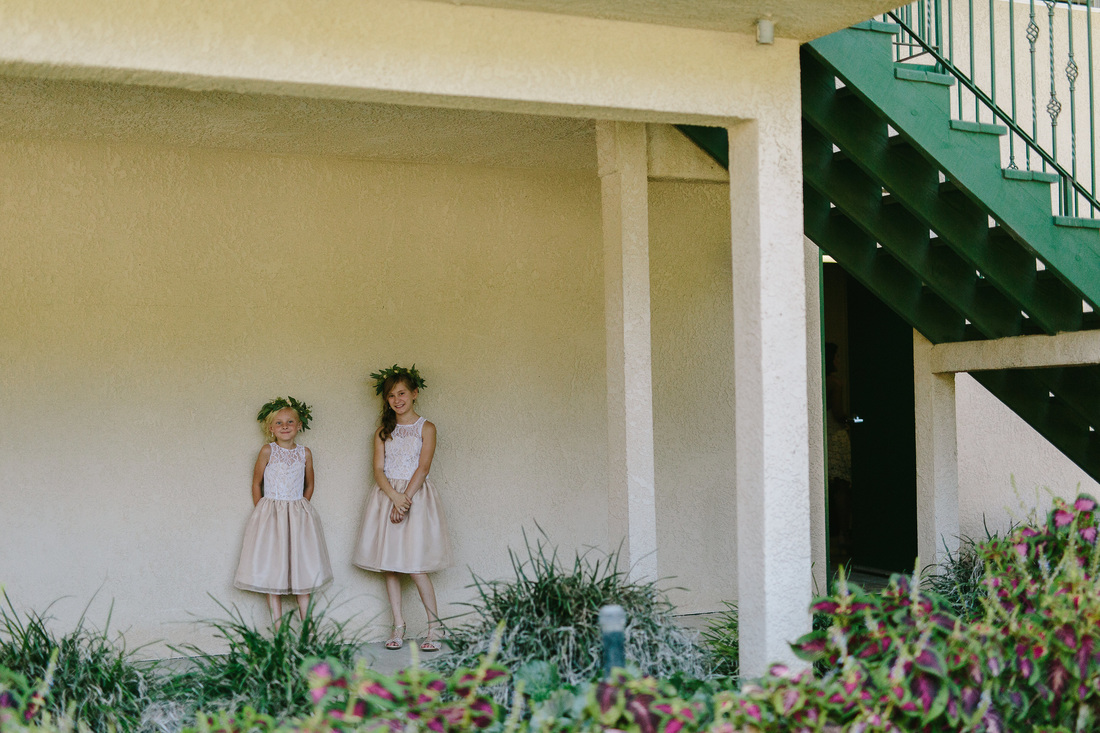     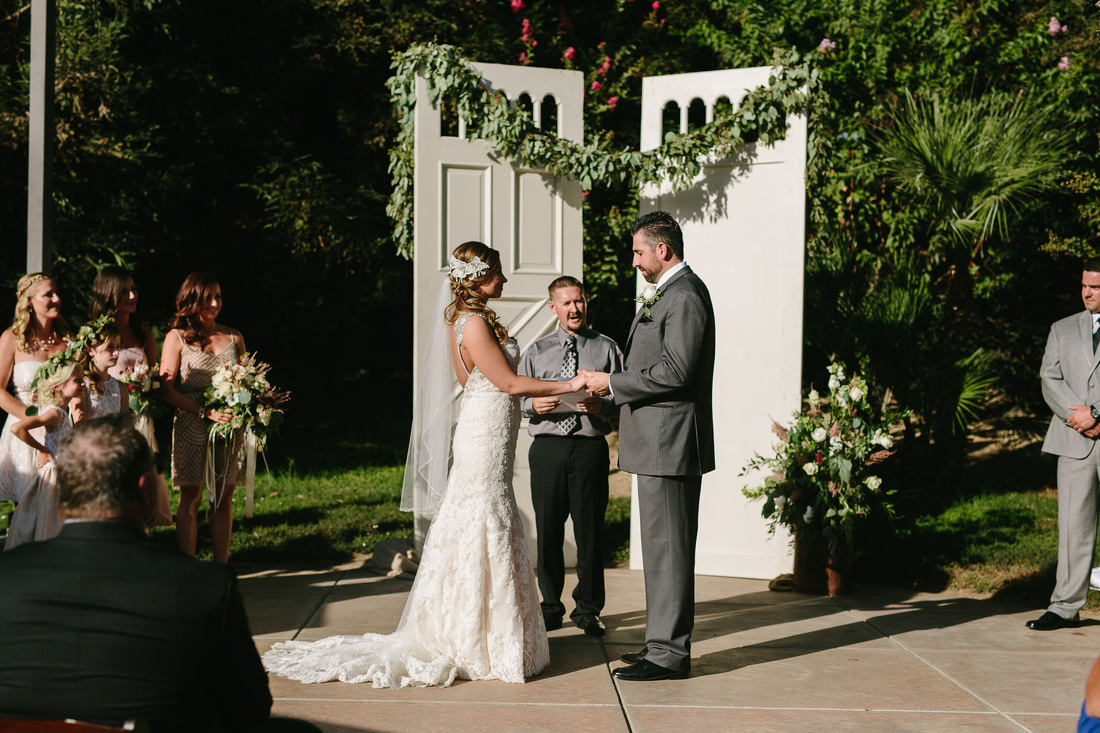 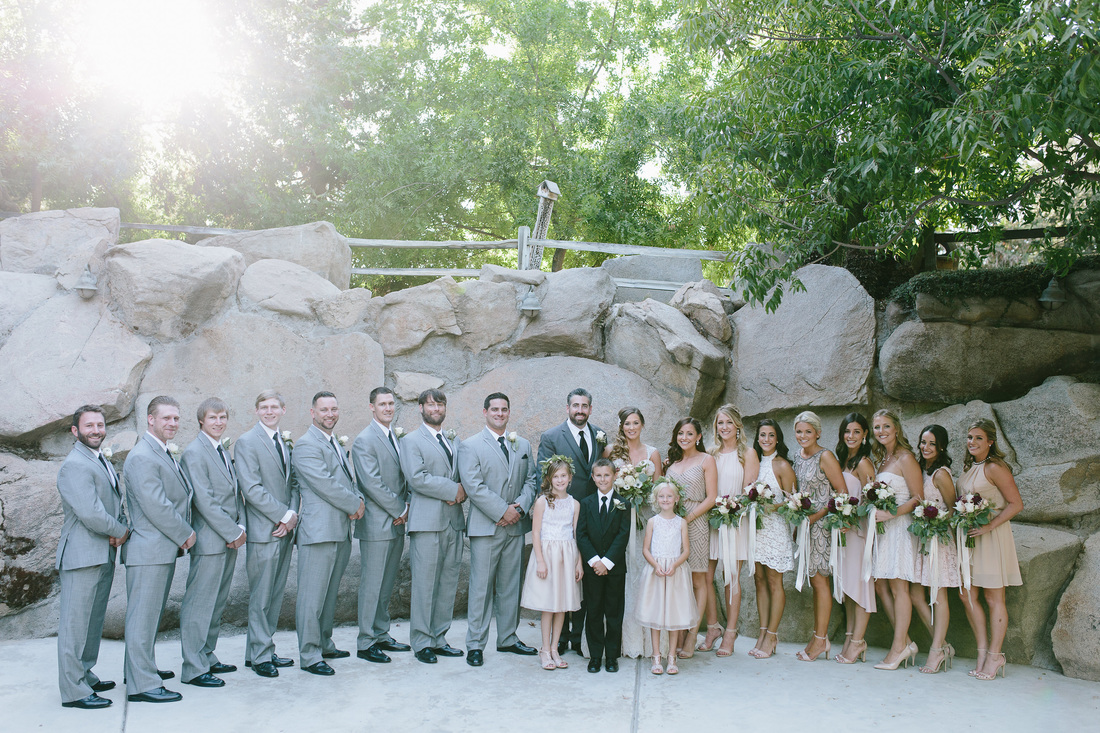 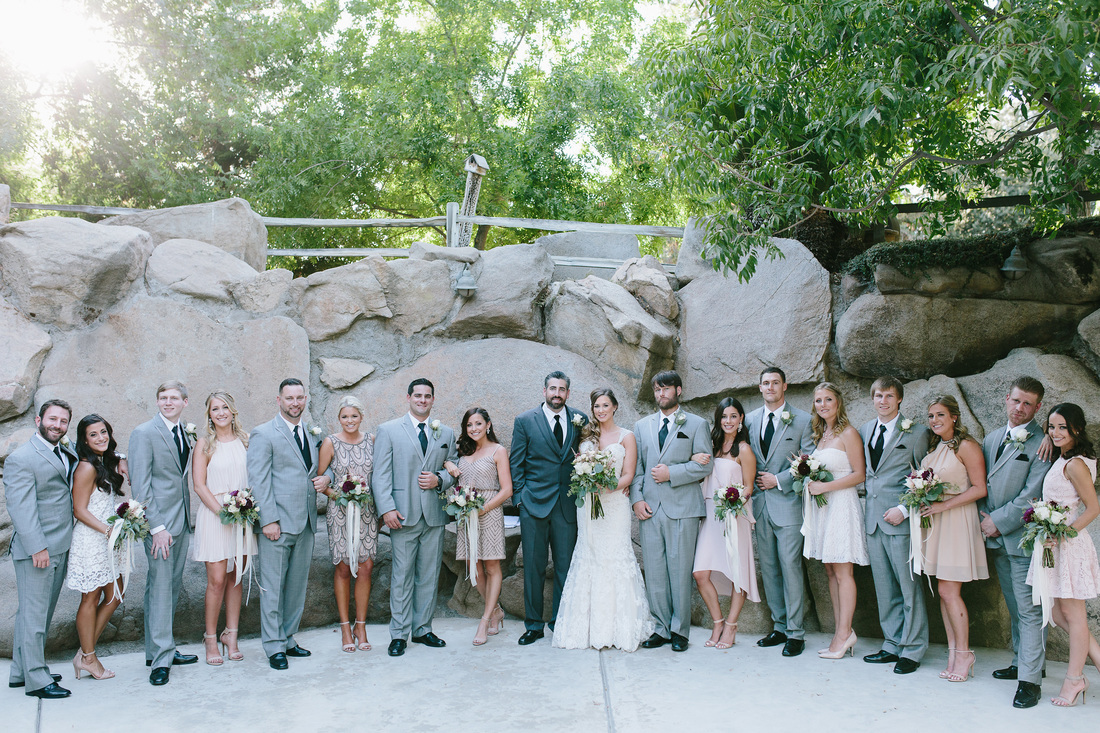      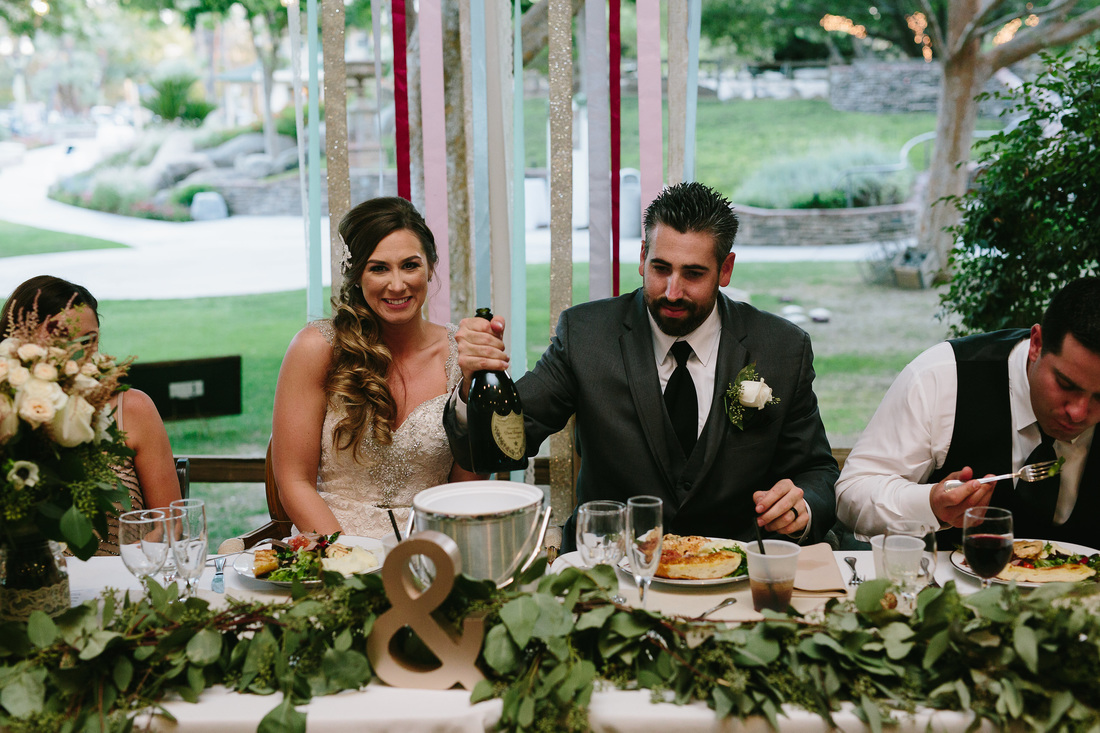     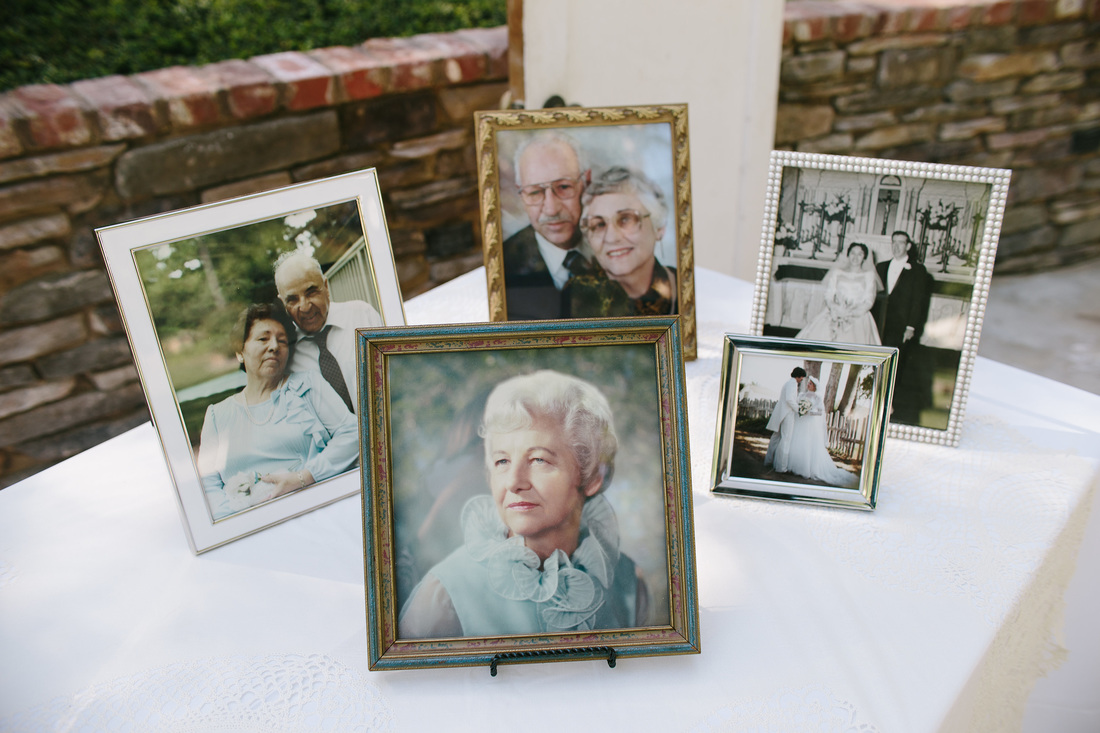 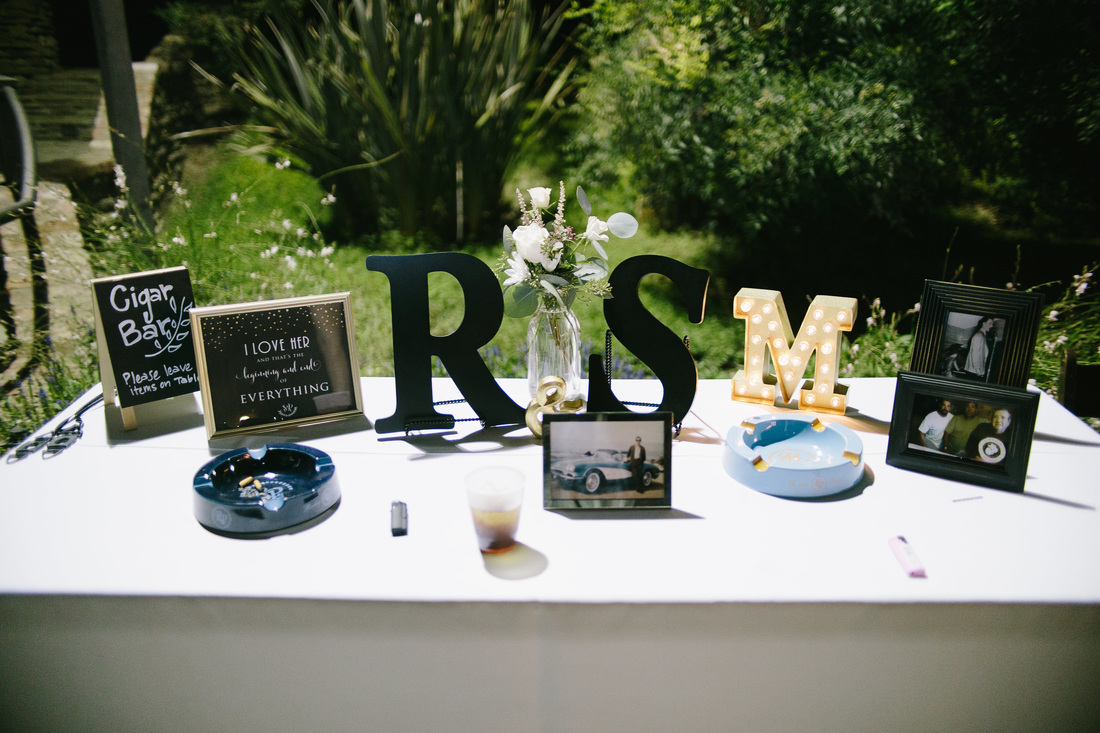   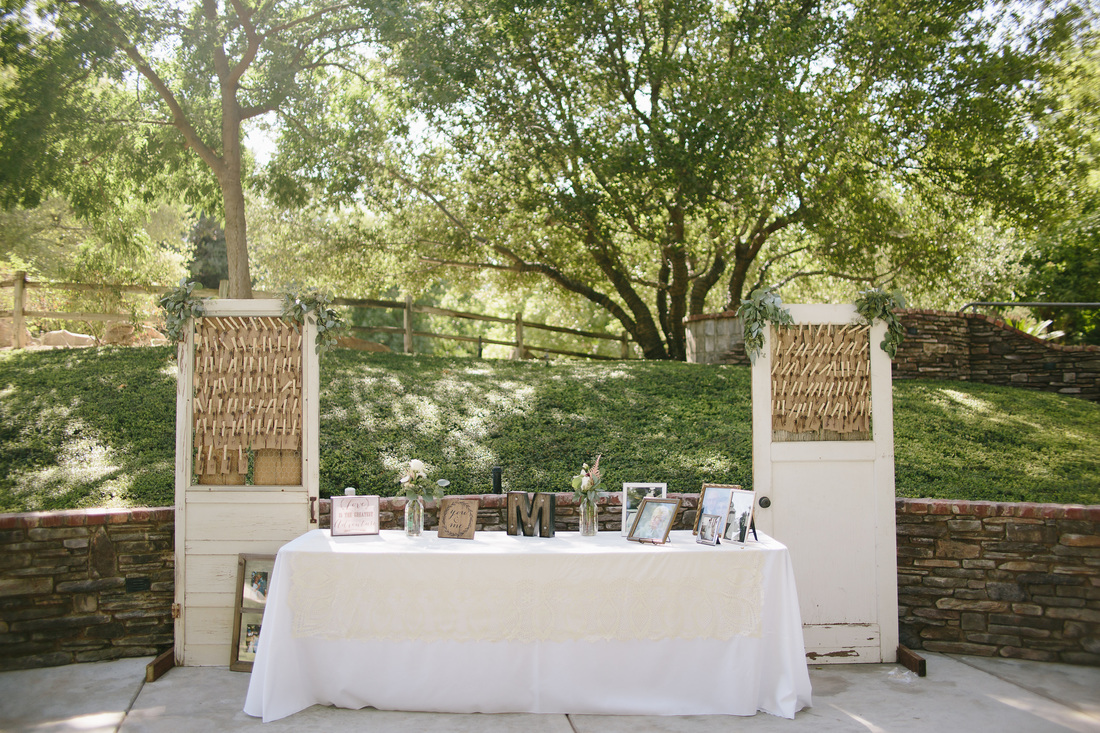 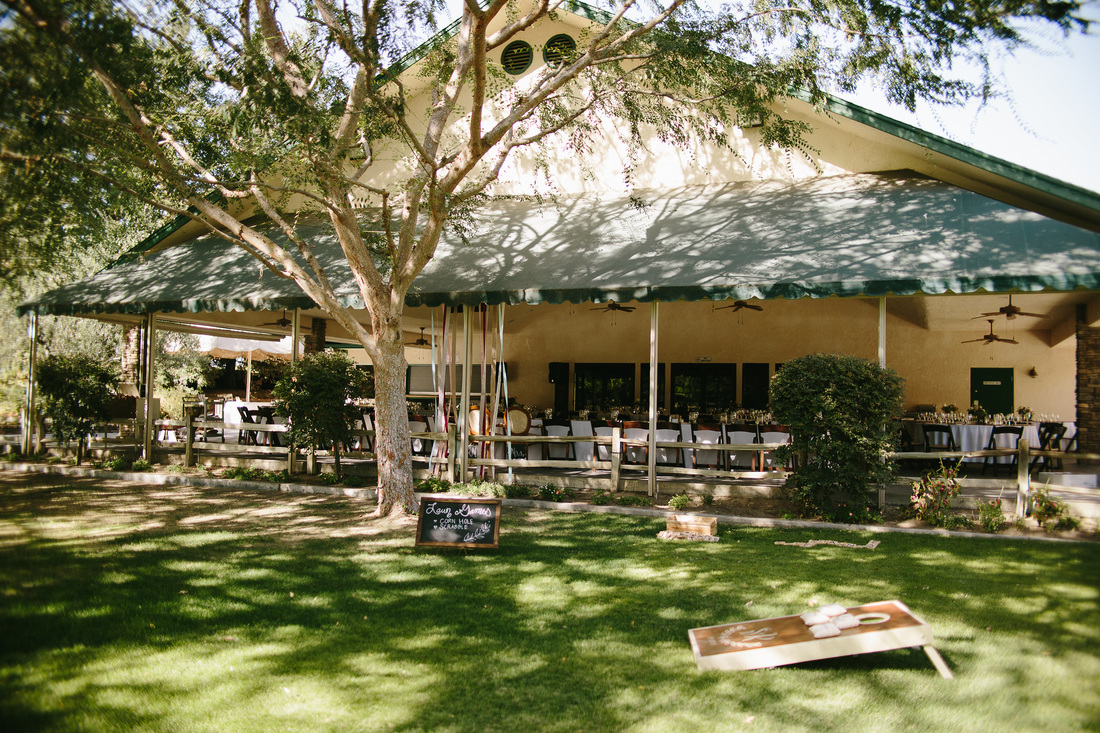 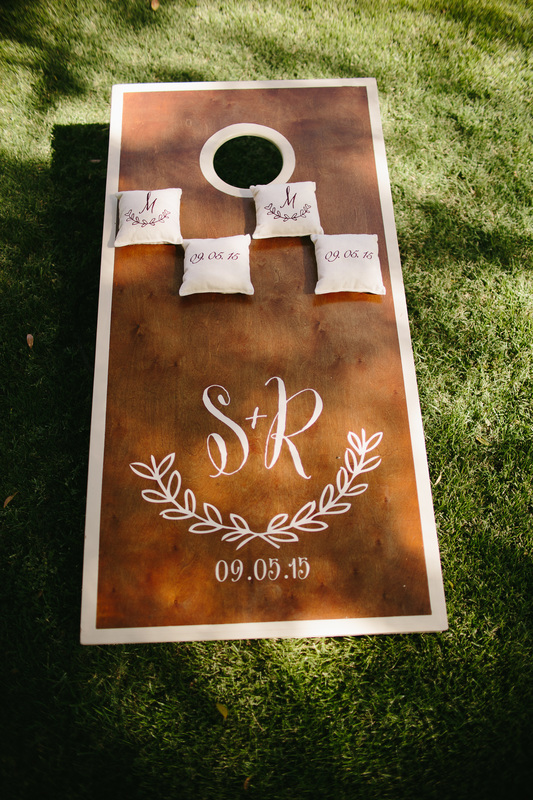  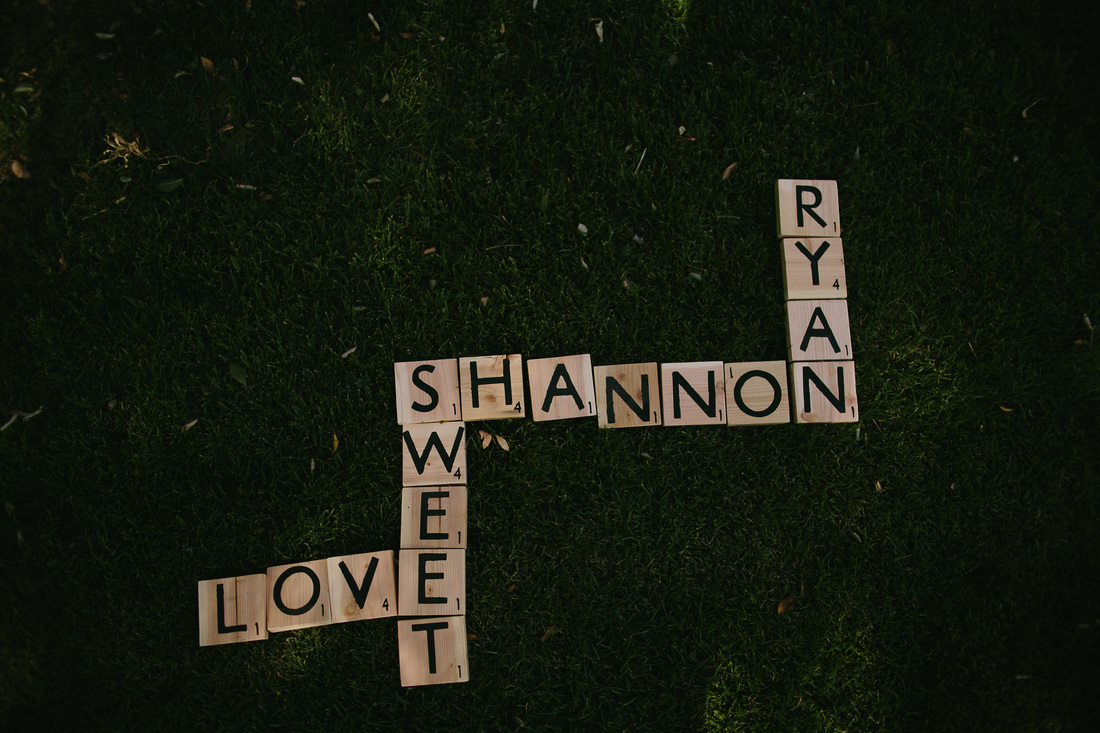 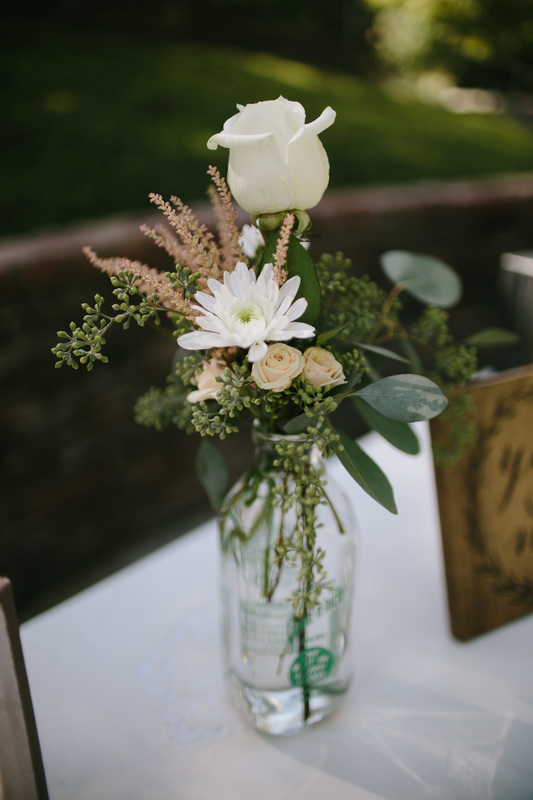  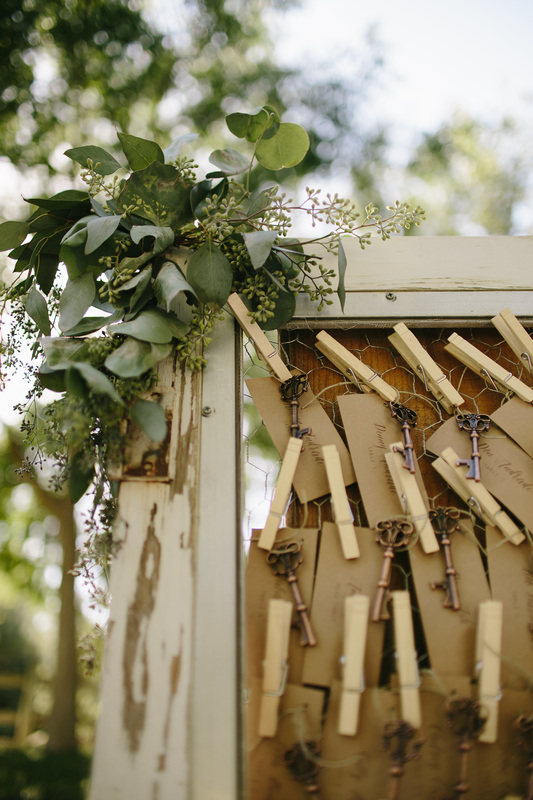 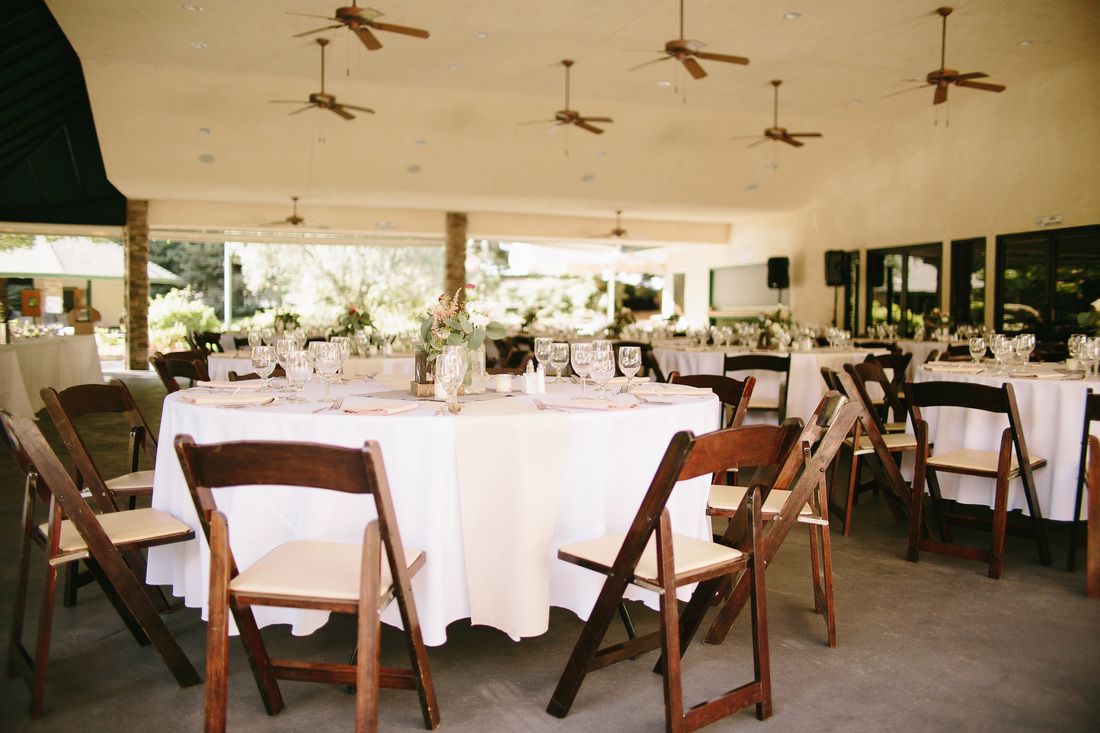 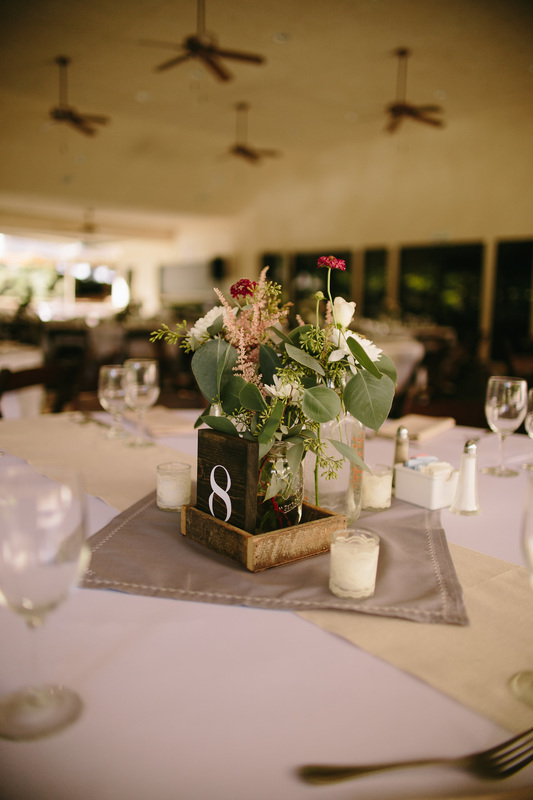 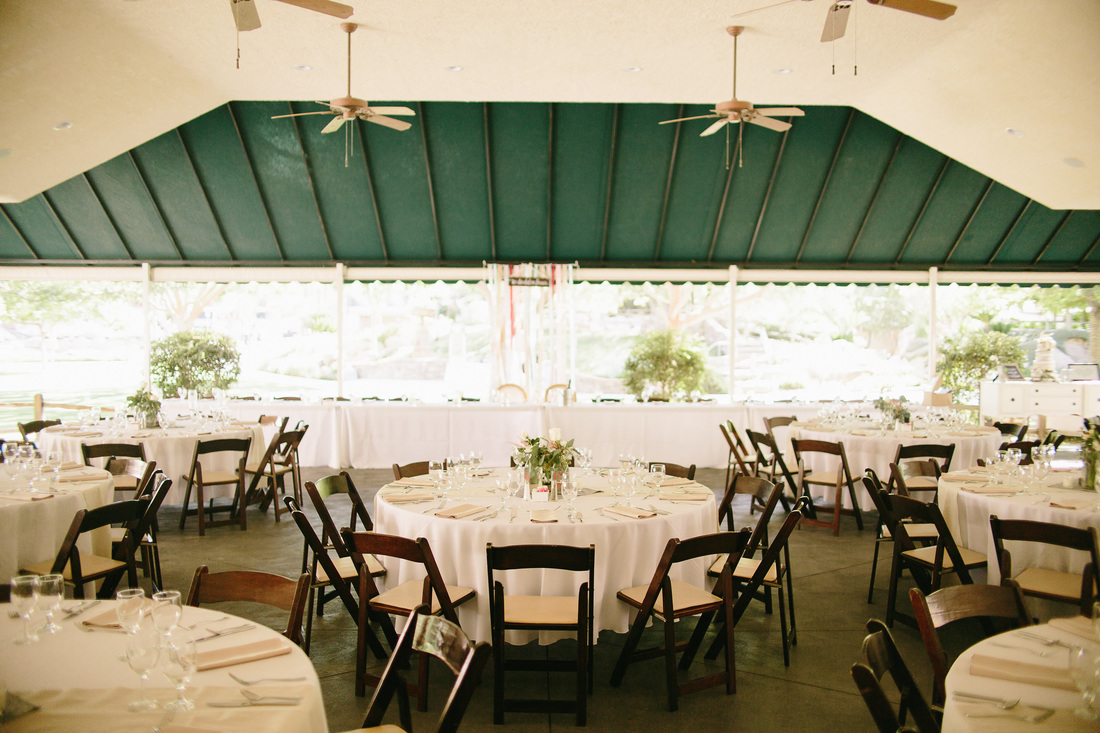 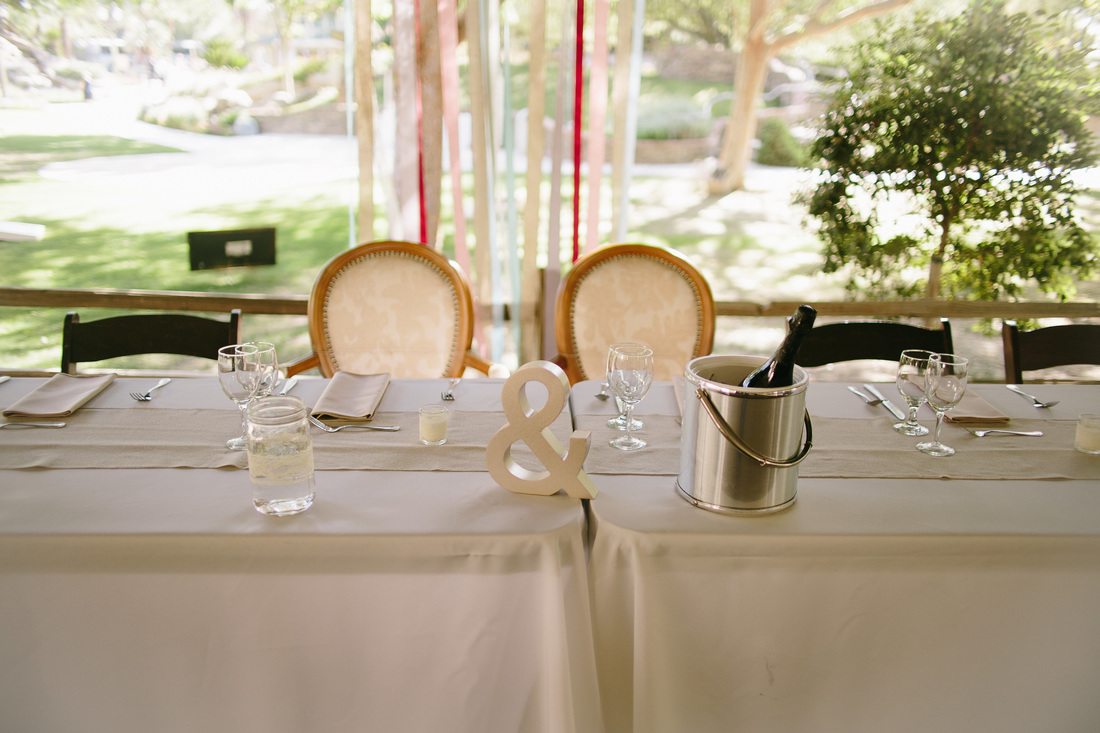 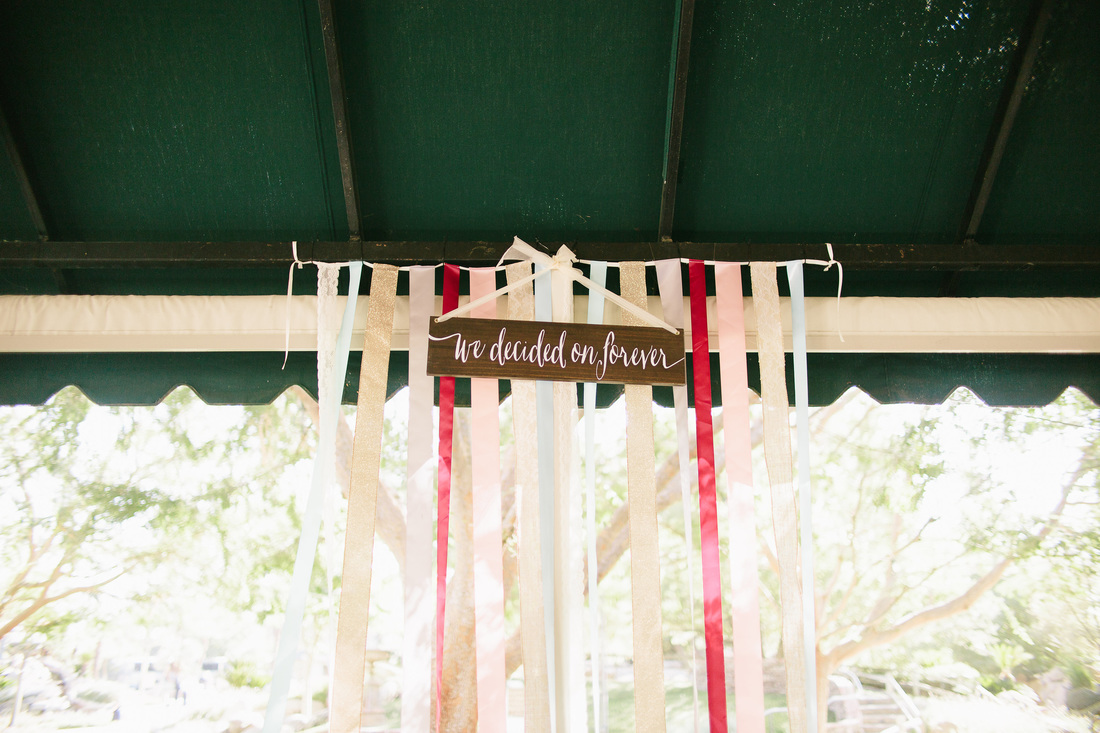 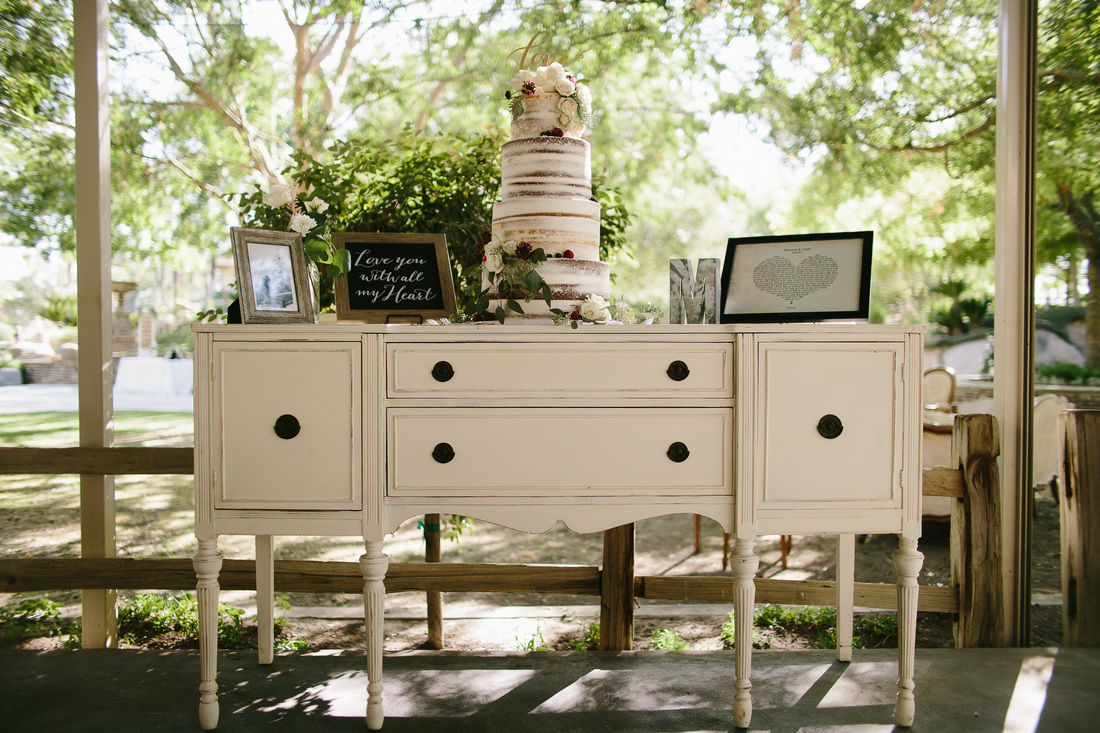 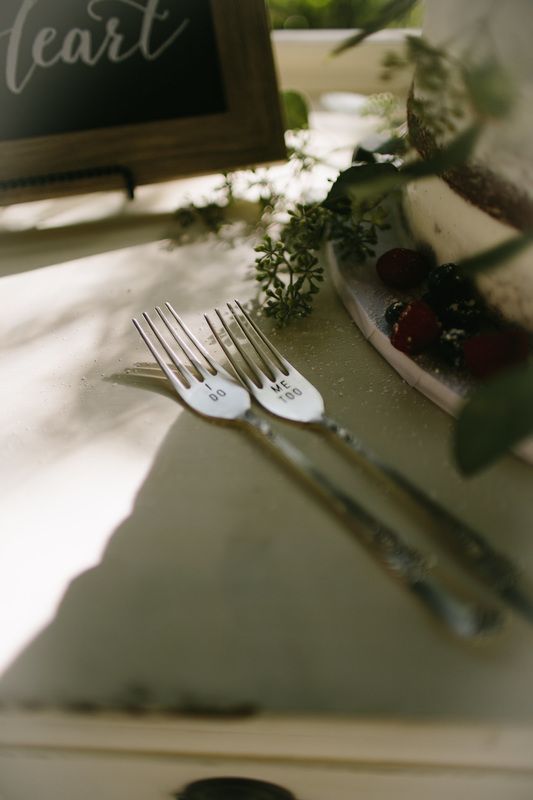 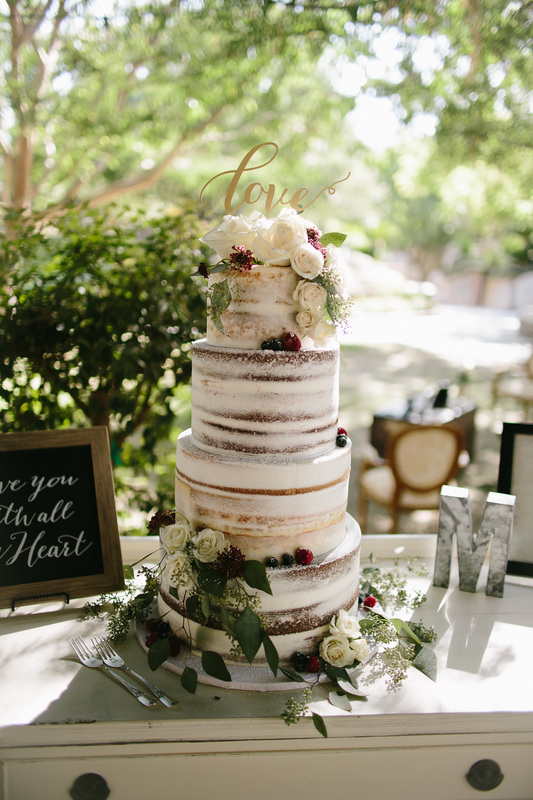 Venue: Holland Park West
Vintage Rentals: O What Joy Cake: Frosted Cakery Florist: Lou Gentile's Flower Basket Day of Coordinator: Eclectic Affairs Photographer: Vanessa Lynn Photography |
AuthorShannon McAlister | Educator, wifey and conscious mama who is practicing mindful living + appreciating the everyday magic! CategoriesAll Astrology Conscious Parenting Events Archived Generators Human Design Human Design + Branding Human Design Centers Manifesting Generators Manifestors Mindfulness My Story Rebel Soul Stories Recipes Reflectors Self Discovery Self-Discovery Archives
December 2023
|
 RSS Feed